Connecting Registries
Connectors
Analyze and optimize your own images
Understanding public containers is great at the start of a project or when you are upgrading from one base image to another, but most developers want to understand and optimize their own images. On the Slim Developer Platform, you can do this using Connectors.
Leveraging connectors
Connectors are a secure link between external container registries (public or private) and the Slim Developer platform. This means that we authenticate you through the registries, giving the platform access to your own images so you can analyze and optimize them. Often, it is in the form of a secure API token generated via the registry's UI or command-line interface.
Currently, connectors are available through: DockerHub, Amazon Web Services Elastic Container Registry (AWS ECR), Google Container Registry (GCR), RedHat Quay, Github, DigitalOcean, Azure Container Registry (ACR), and Gitlab. With future platform releases, you can expect this list to grow.
Establish a connection to a container service
Let’s walk through examples of connecting a container service provider on the platform for accessing & using your own images. Each container service listed has their own steps to ensure you have successfully linked a connector in the platform.
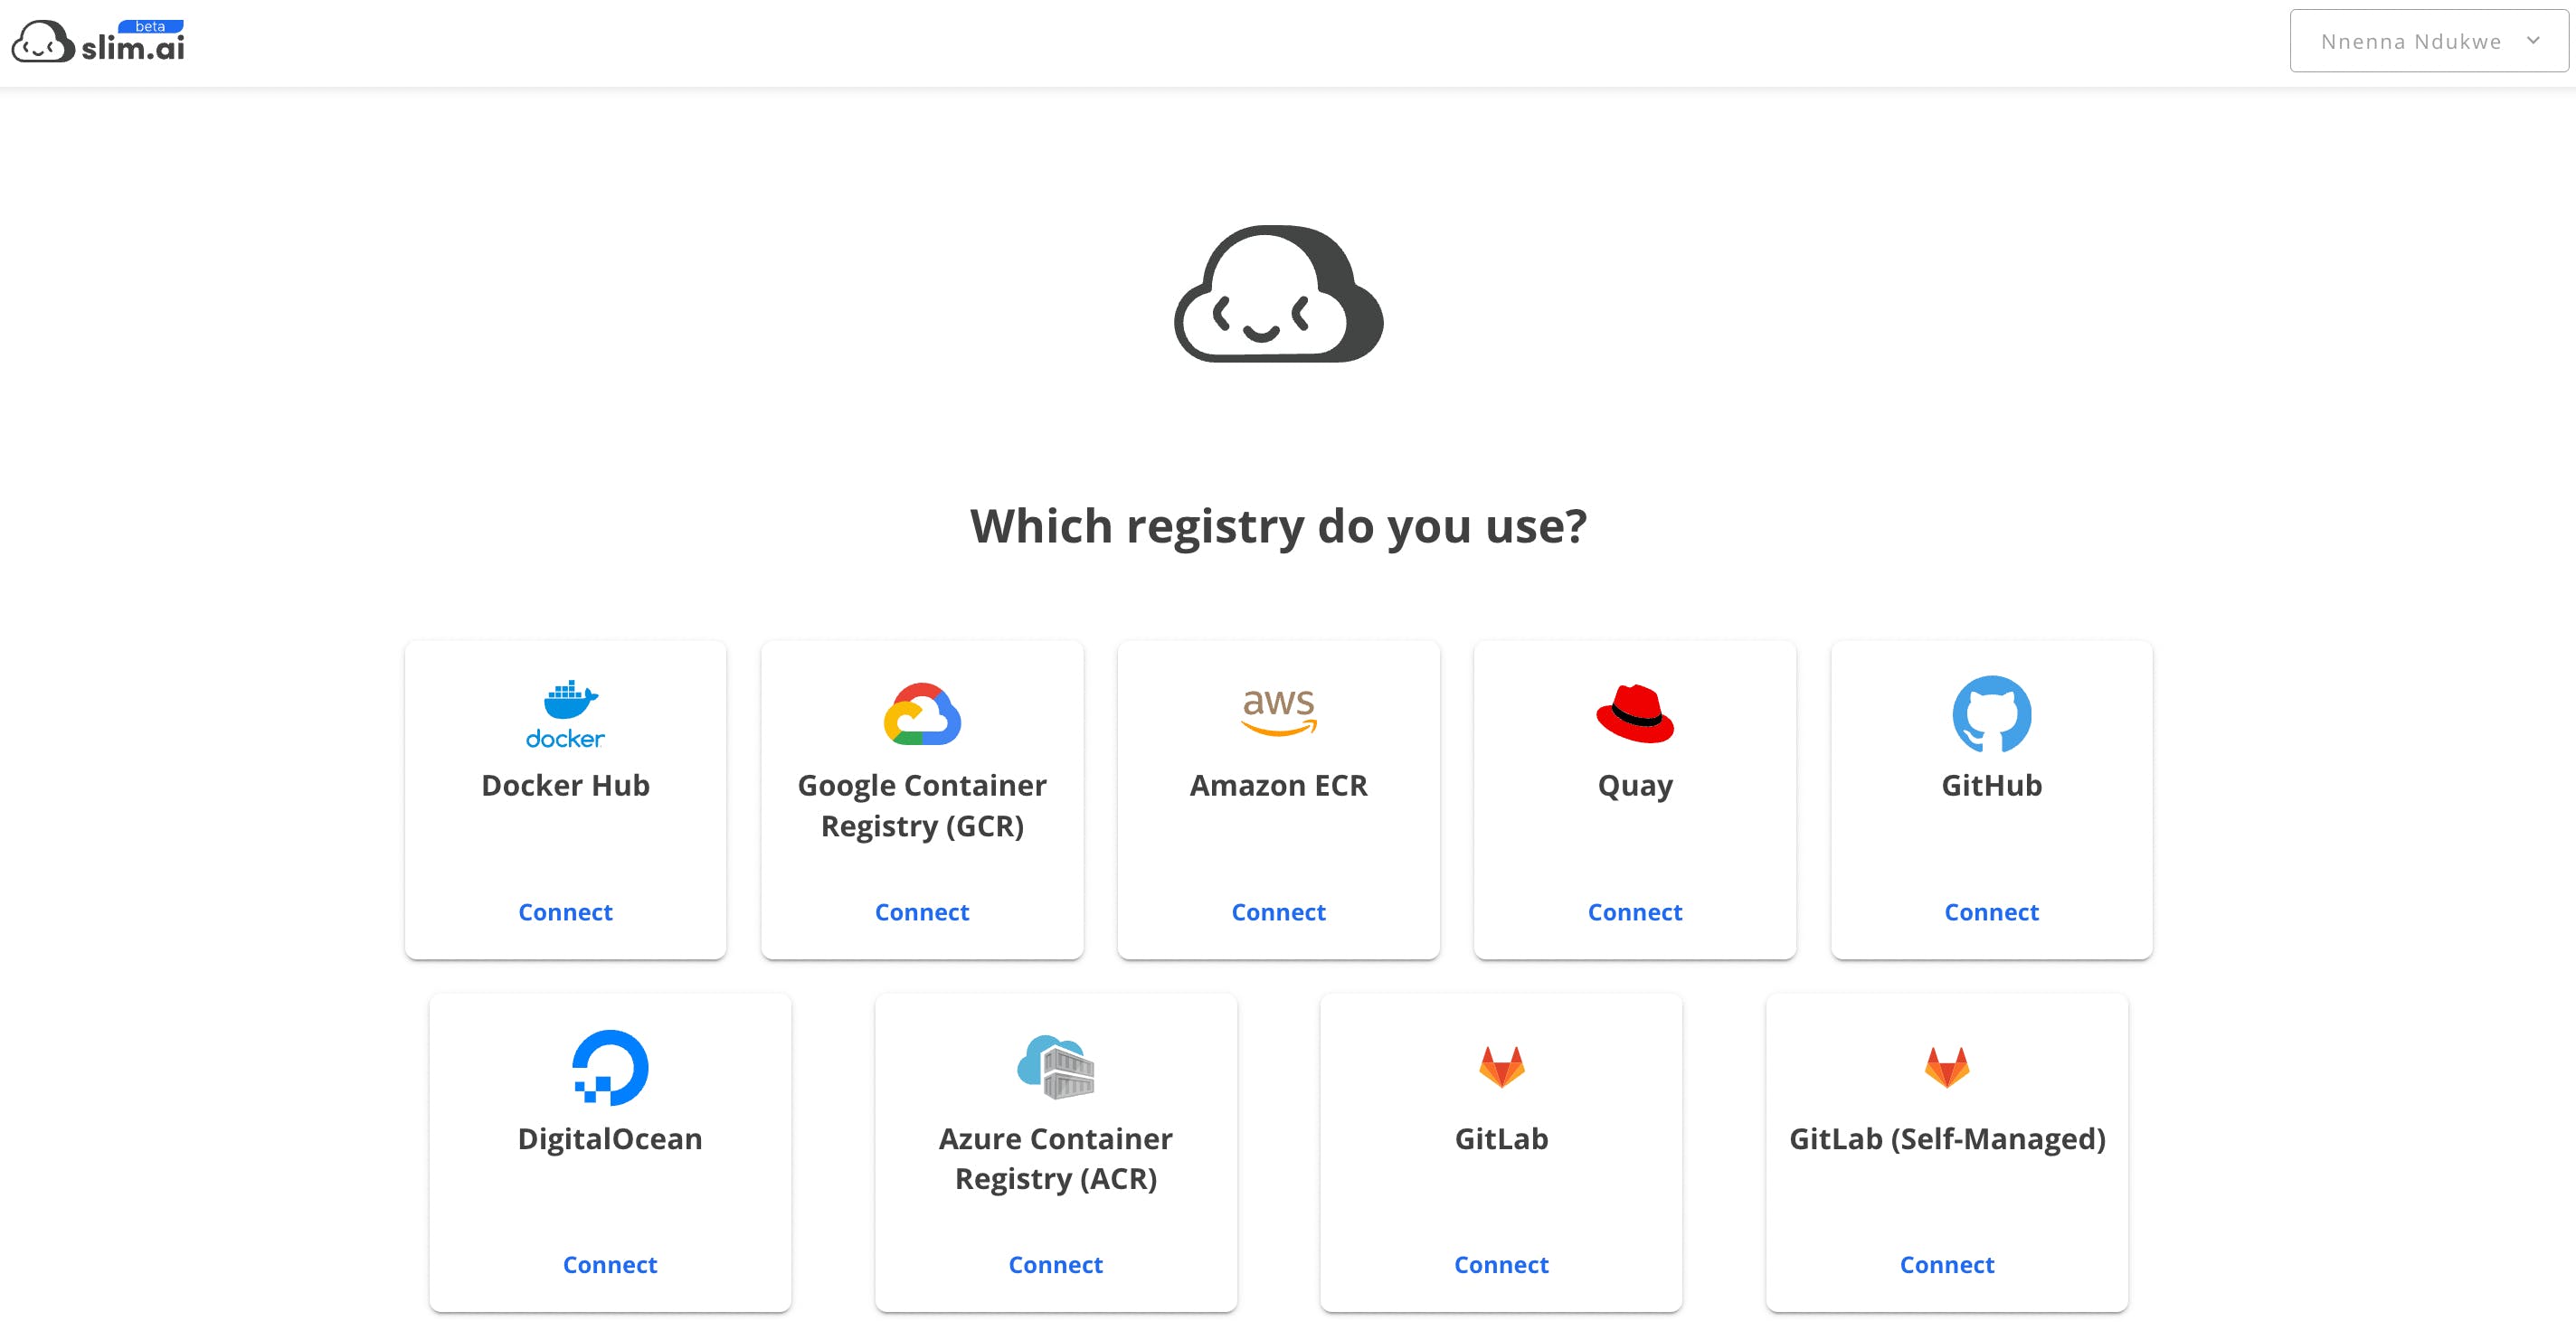
Navigate to My Registries on the platform and click on “connect a new registry” to begin the quick setup process.
Github
- Select the Github container service option.
You will see instructions on how to generate and add your personal access token via Github.
- Sign in to your Github account and navigate to your Personal Access Tokens.
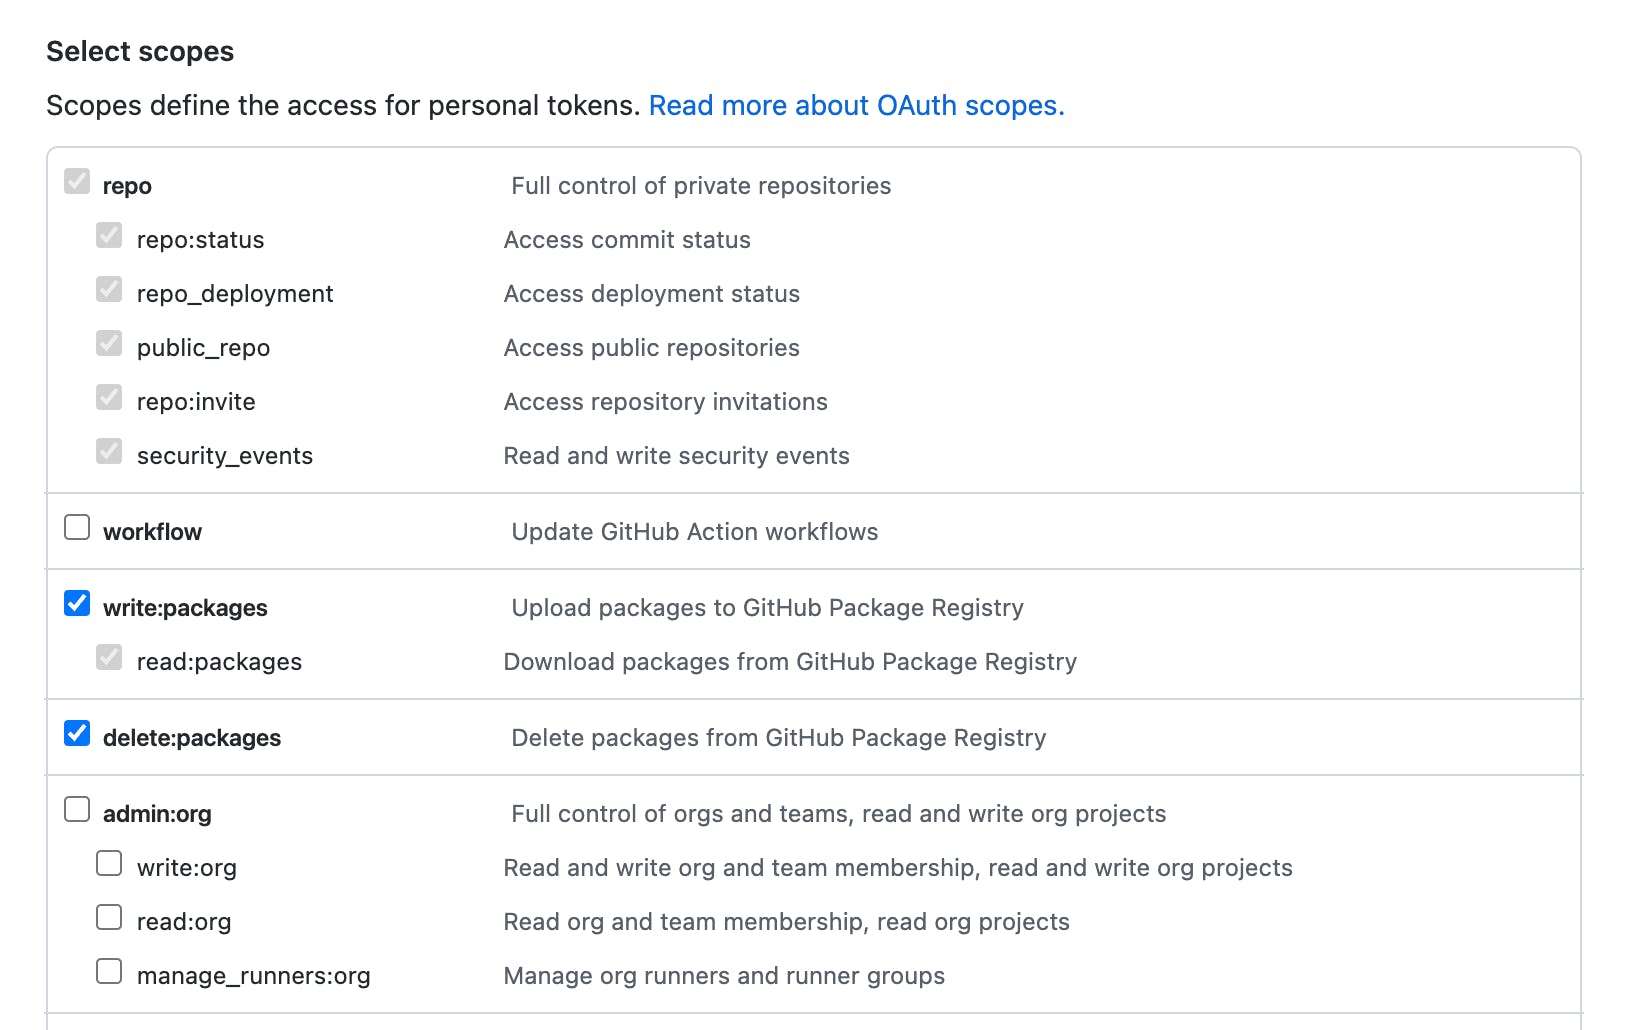
- From there, click the Generate new token button to create a new token you’ll use for Slim. When selecting your token scopes, make sure it can:
- write packages
- read packages
- delete packages
This is what you would see for the new token you’re generating to select the correct scopes on Github.
Your newly generated personal access token and your Github username will be required input in our Github connector form to establish connection to the registry.
Customize the connector name to your preference. This does not impact the ability for Slim to successfully connect to the registry.
Copy and paste your Personal Access Token into the form in order to successfully create the connection.
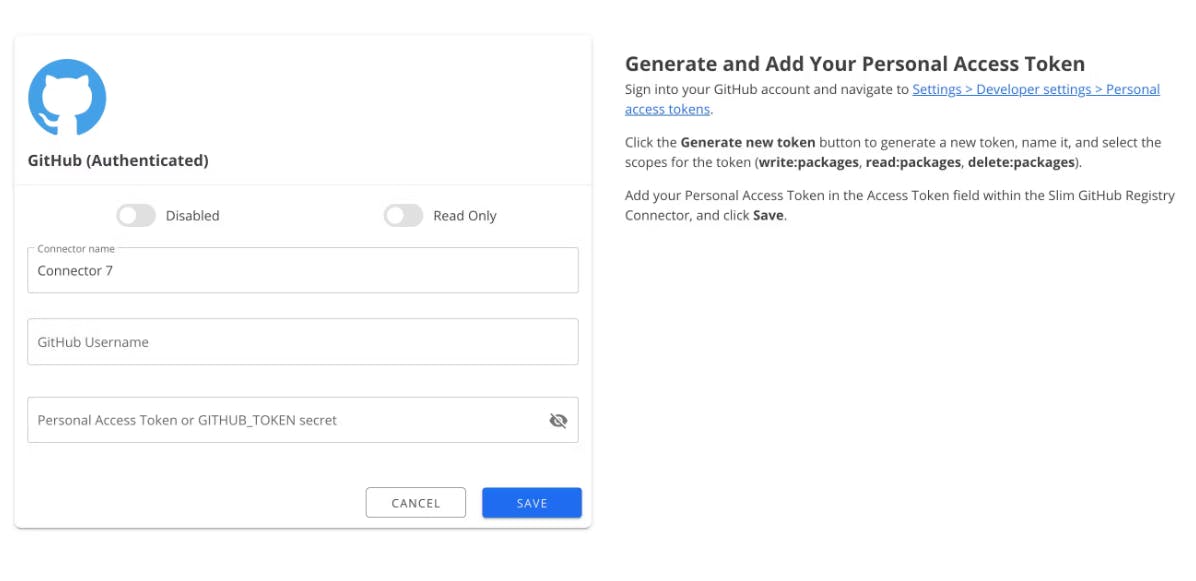
Click Save in order to complete the connection process.
💡 The Connector ID should then appear at the bottom of the form. This ID can be utilized for interacting with the Slim CLI.
You have now successfully linked your Github registry with Slim as a connector to the images you own.
Docker Hub
Select the Docker Hub container service option.
Name your connector and use your Docker Account ID in the connector form before signing in to Docker Hub to generate a new access token.
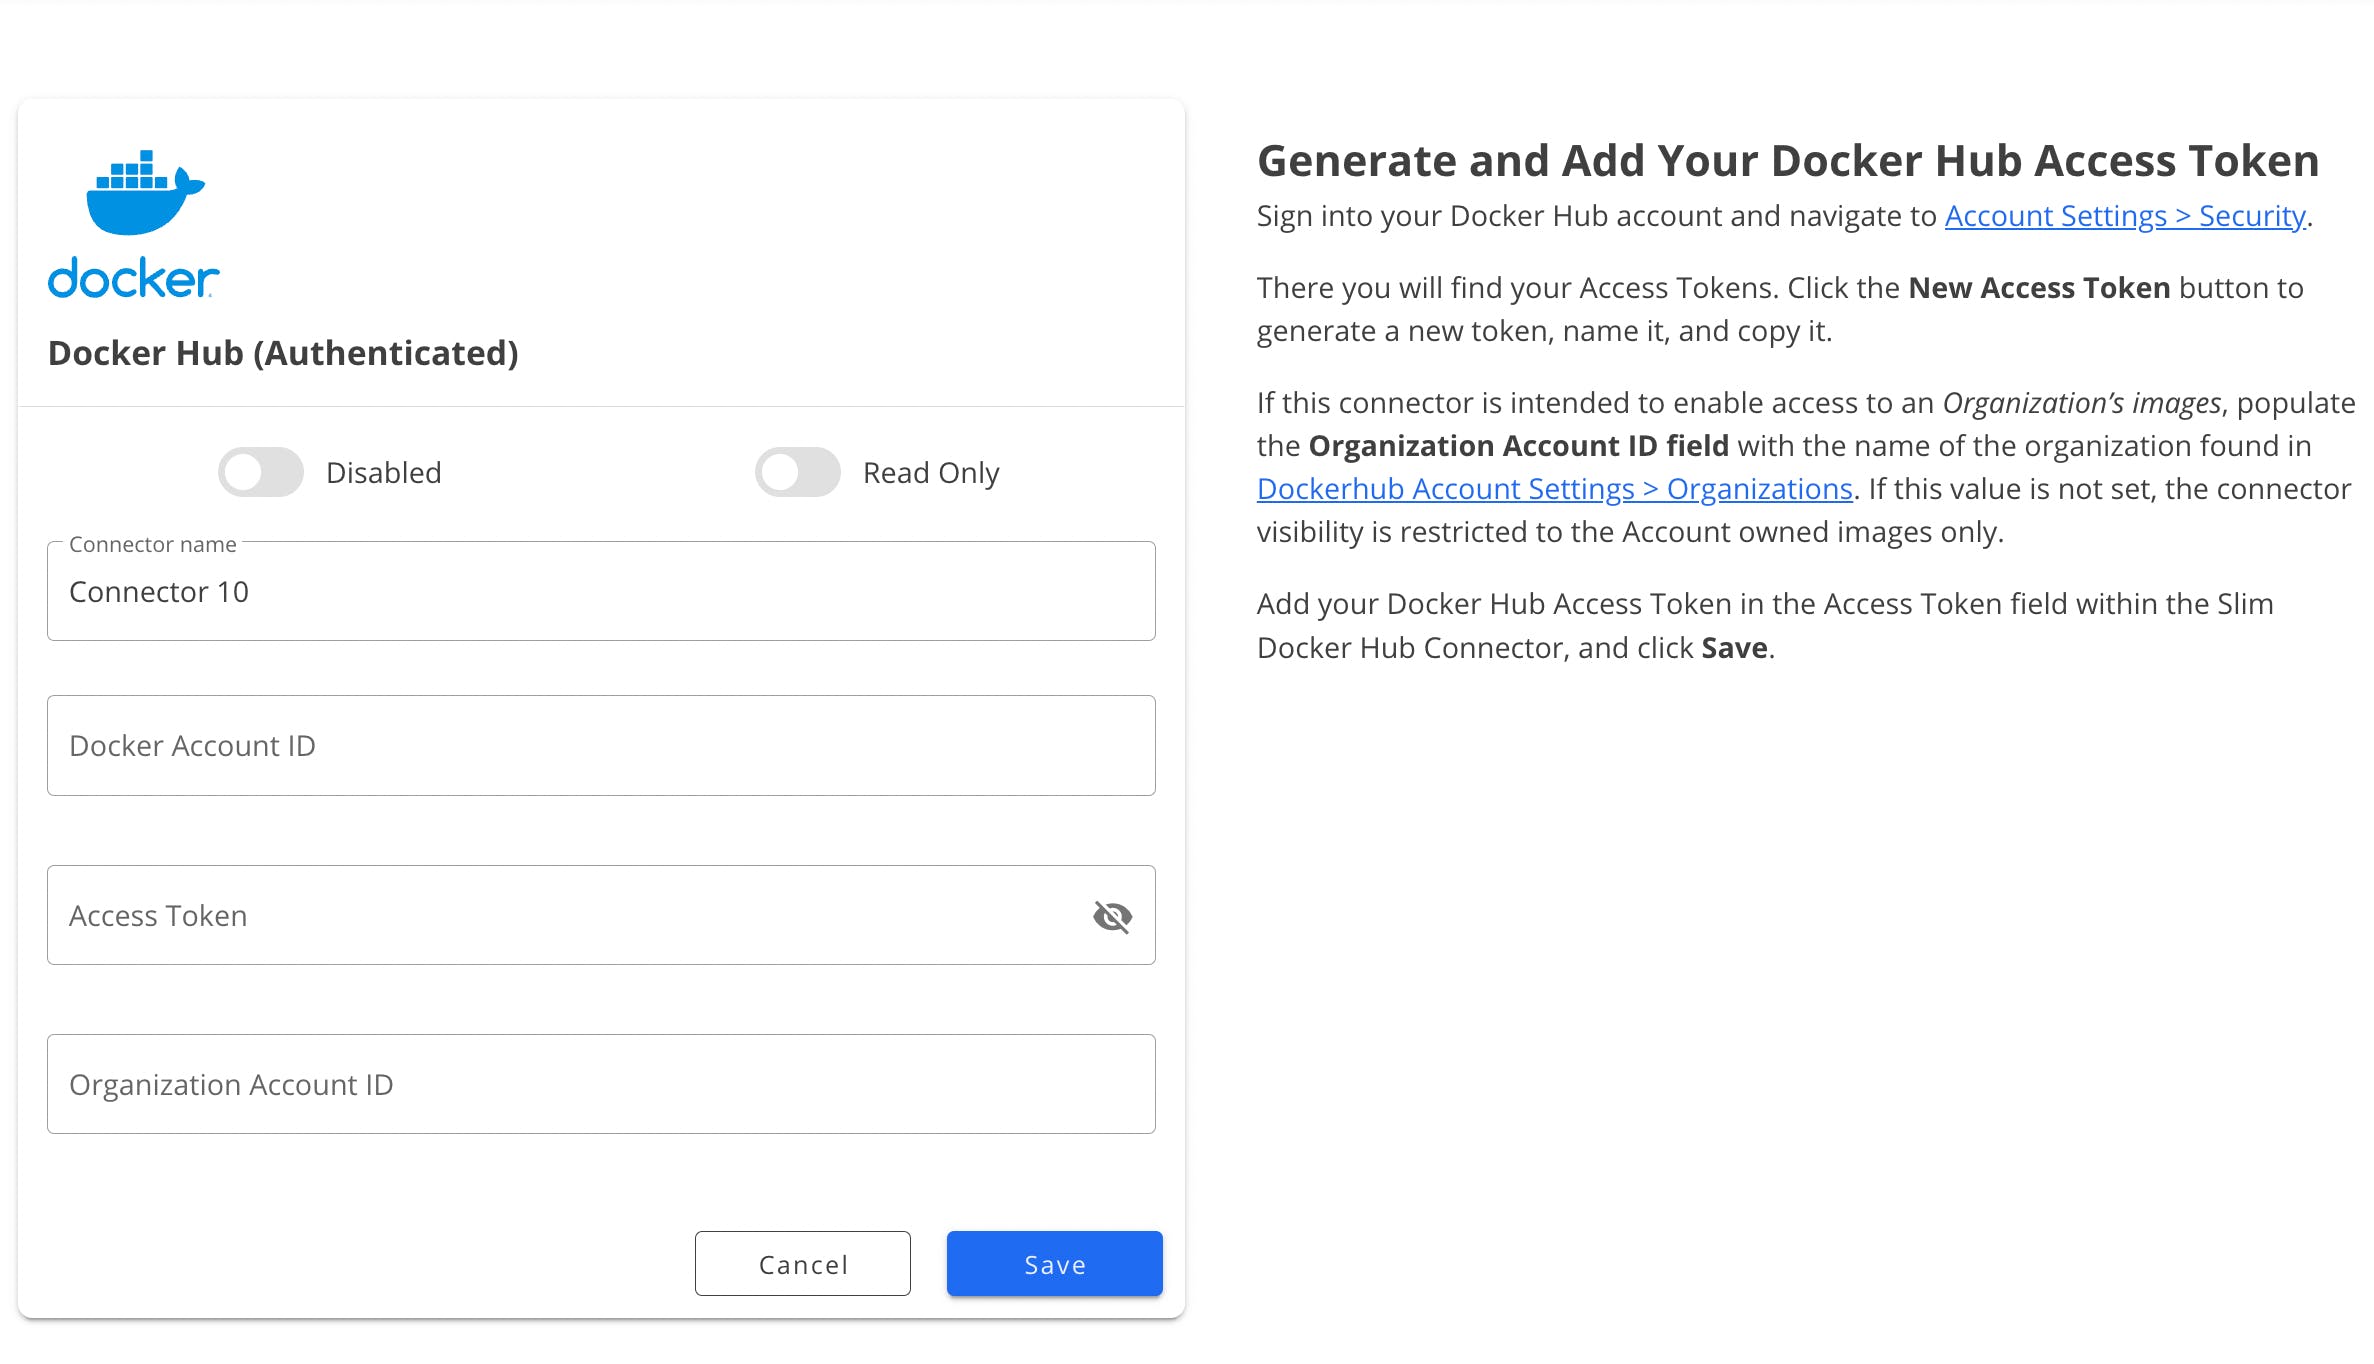
Sign into your Docker Hub account (or sign up if you do not have an account). Navigate to Account Settings > Security.
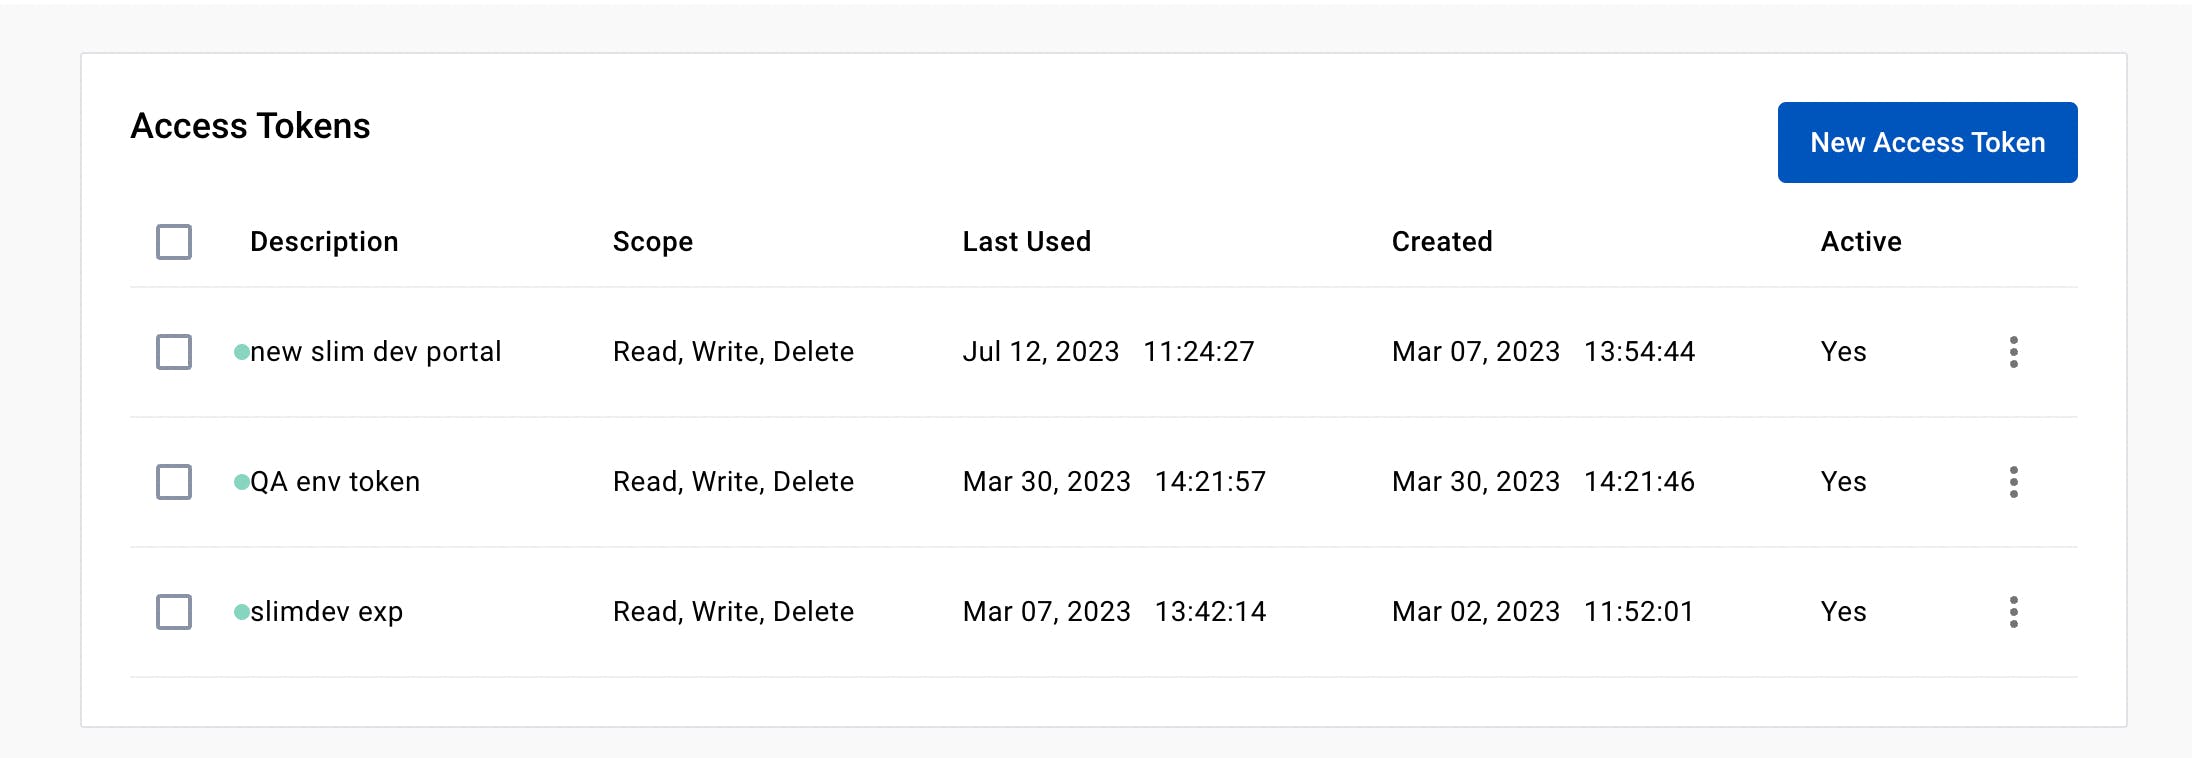
There you will find your Access Tokens.
Click the New Access Token button to generate a new token.
Name the new token and copy it to use in the Docker Hub connector form on the platform.
If this connector is meant to enable access to an Organization’s images, populate the Organization Account ID field with the name of the organization found in Docker Hub > Orgs.
If this value is not set, the connector visibility is restricted to the account-owned images only.
Click Save.
Amazon ECR
Select the Amazon ECR container service option from your Registries view.
You will be taken to the ECR Connector form.
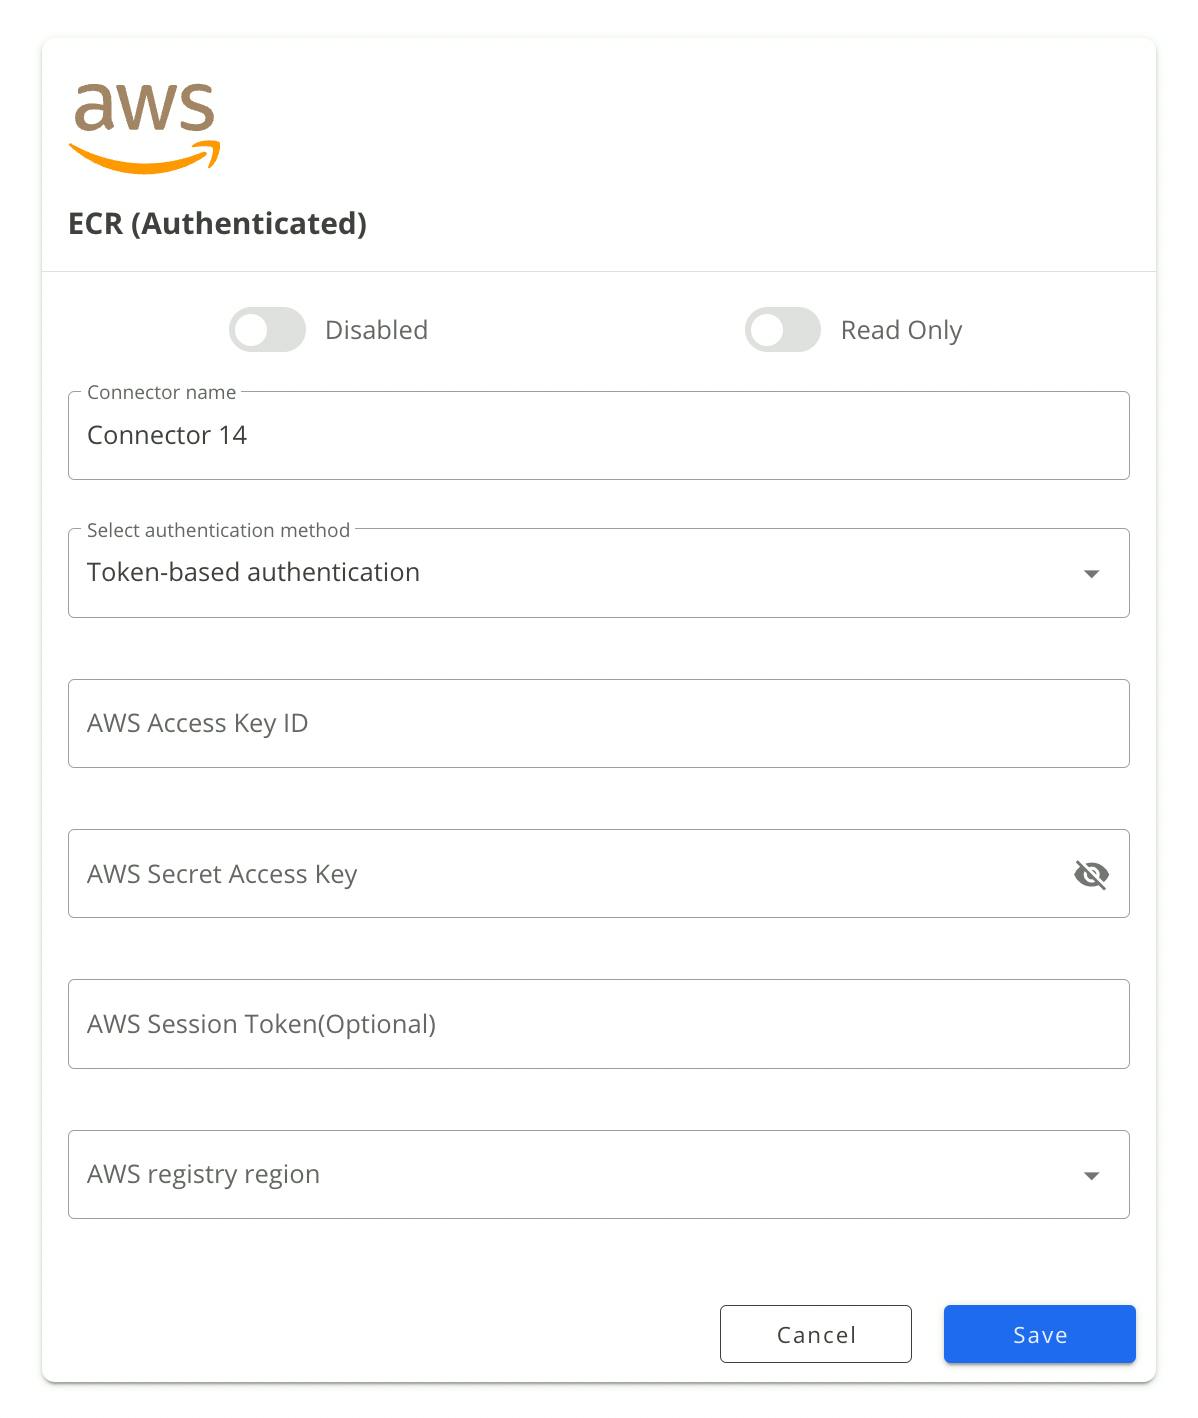
Token-based Authentication
💡 Please note that token-based authentication for AWS is deprecated and not a recommended approach. Switch the authentication method dropdown selection to the cross-account authentication option.
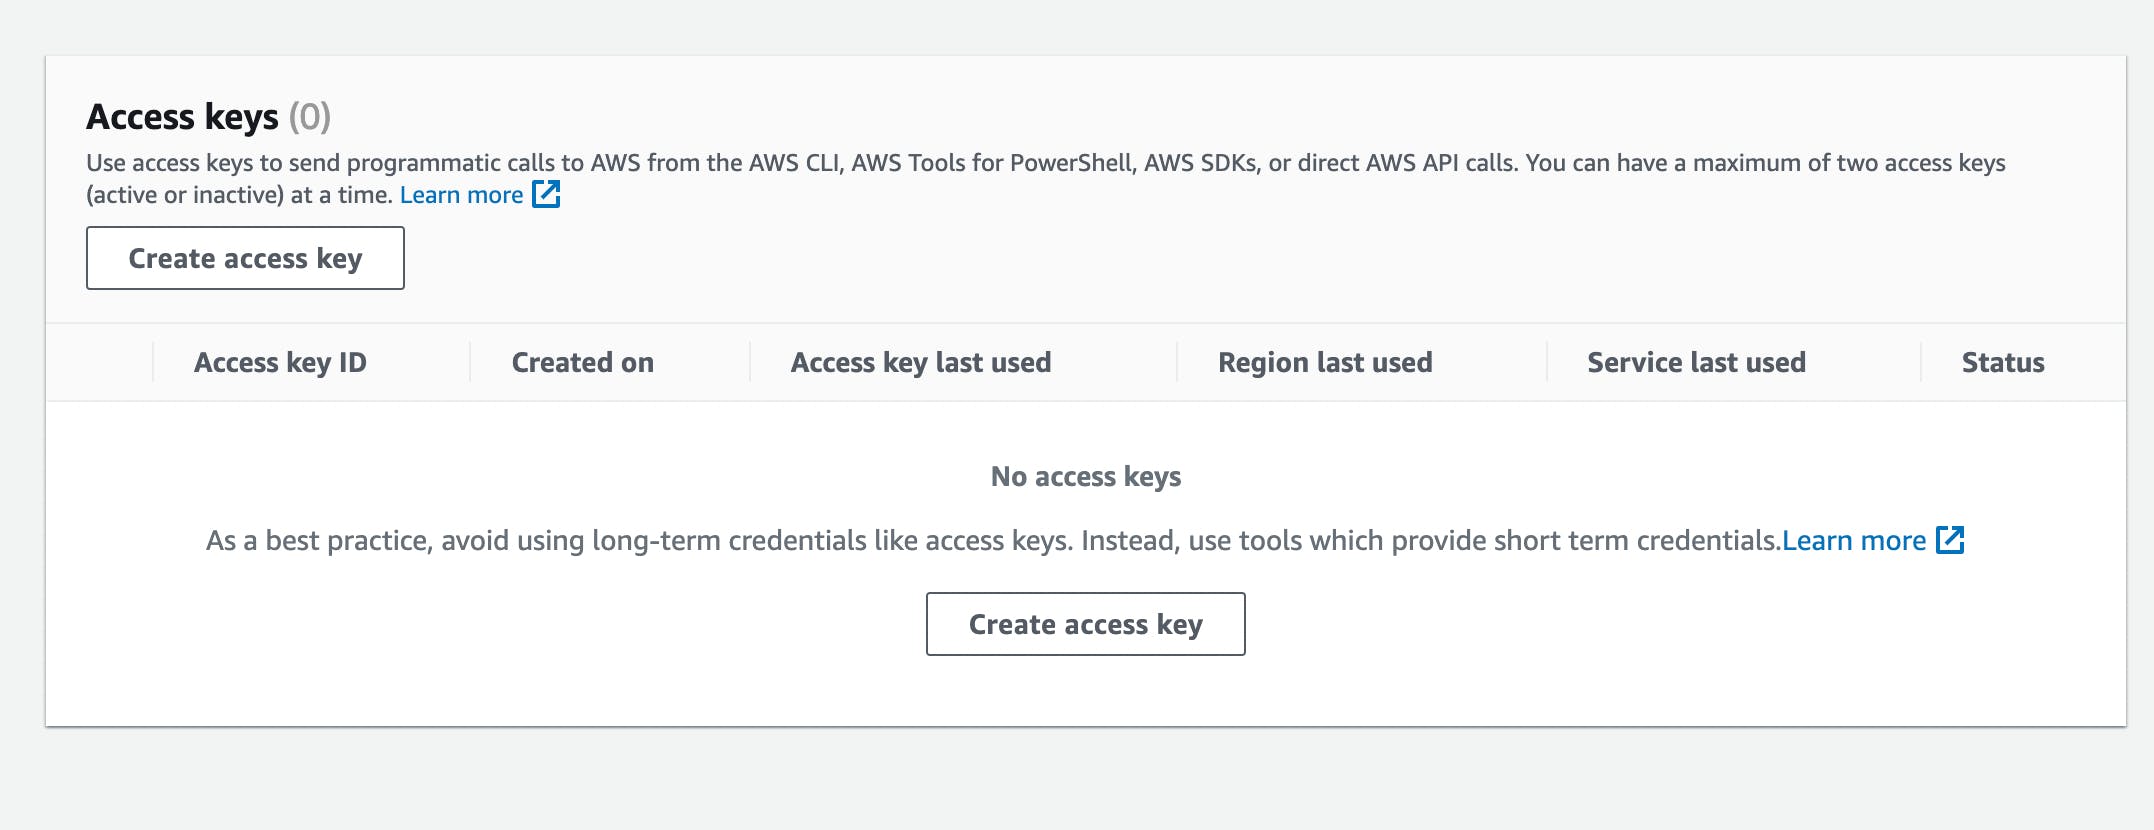
From your AWS console, select the Security Credentials option in your account’s dropdown menu or navigate to the Security Credentials view.
In the Access Keys table listed in the Security Credentials view, click the ”Create access key” button.
Copy and paste the AWS Access Key ID into the connector form.
Copy and paste the AWS Secret Access Key into the connector form as well.
Configure the optional AWS Session Token field if you are using temporary credentials.
Click Save.
Google Container Registry (GCR)
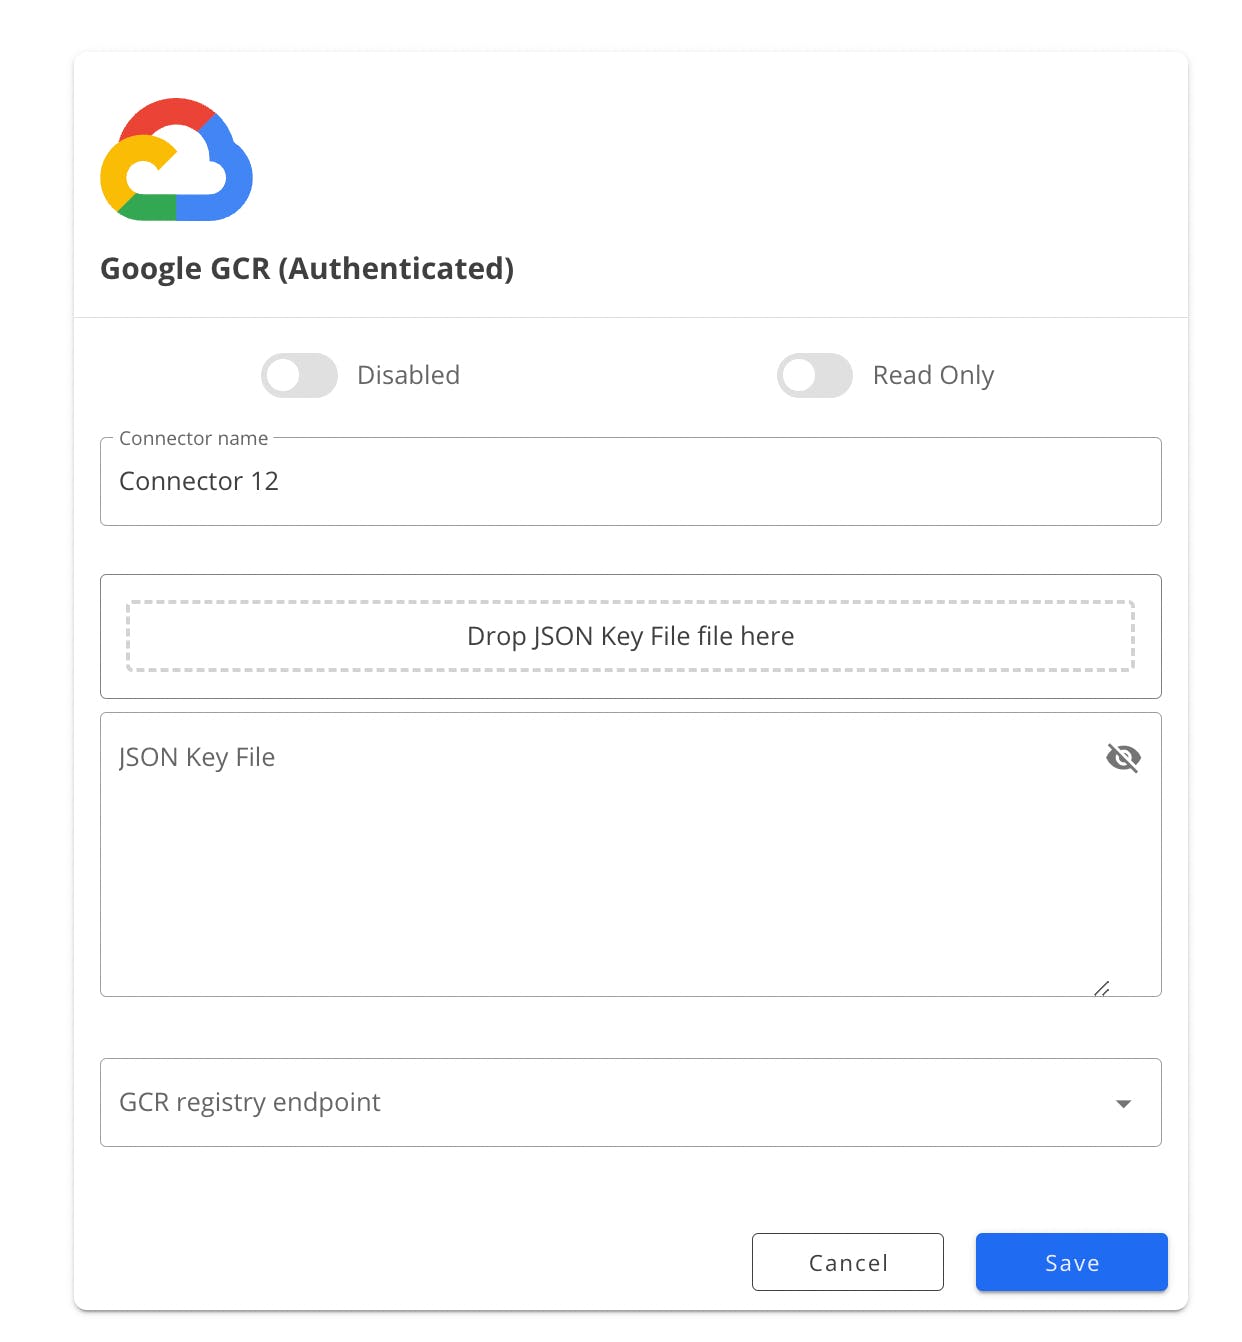
To get GCR connected to the Slim platform, click Google Container Registry (GCR) container service option. You will be taken to the Google connector form page to authenticate your account.
Set up Google Container Registry
If you don’t already have Google Container Registry setup through your organization, there are a few main components that are required in order to establish a connection to Slim. You can ensure these steps are completed all within your Google Cloud Console:
- Create a project or navigate to an existing project your team owns within Google Cloud Console that you want to connect to Slim
- Ensure that Billing within your organization’s account is enabled
- Ensure that the Google Cloud Resource Manager API is enabled in order to create, read, and update metadata for Google Cloud Platform resource containers
- Ensure that a Storage Bucket exists for the project or create one
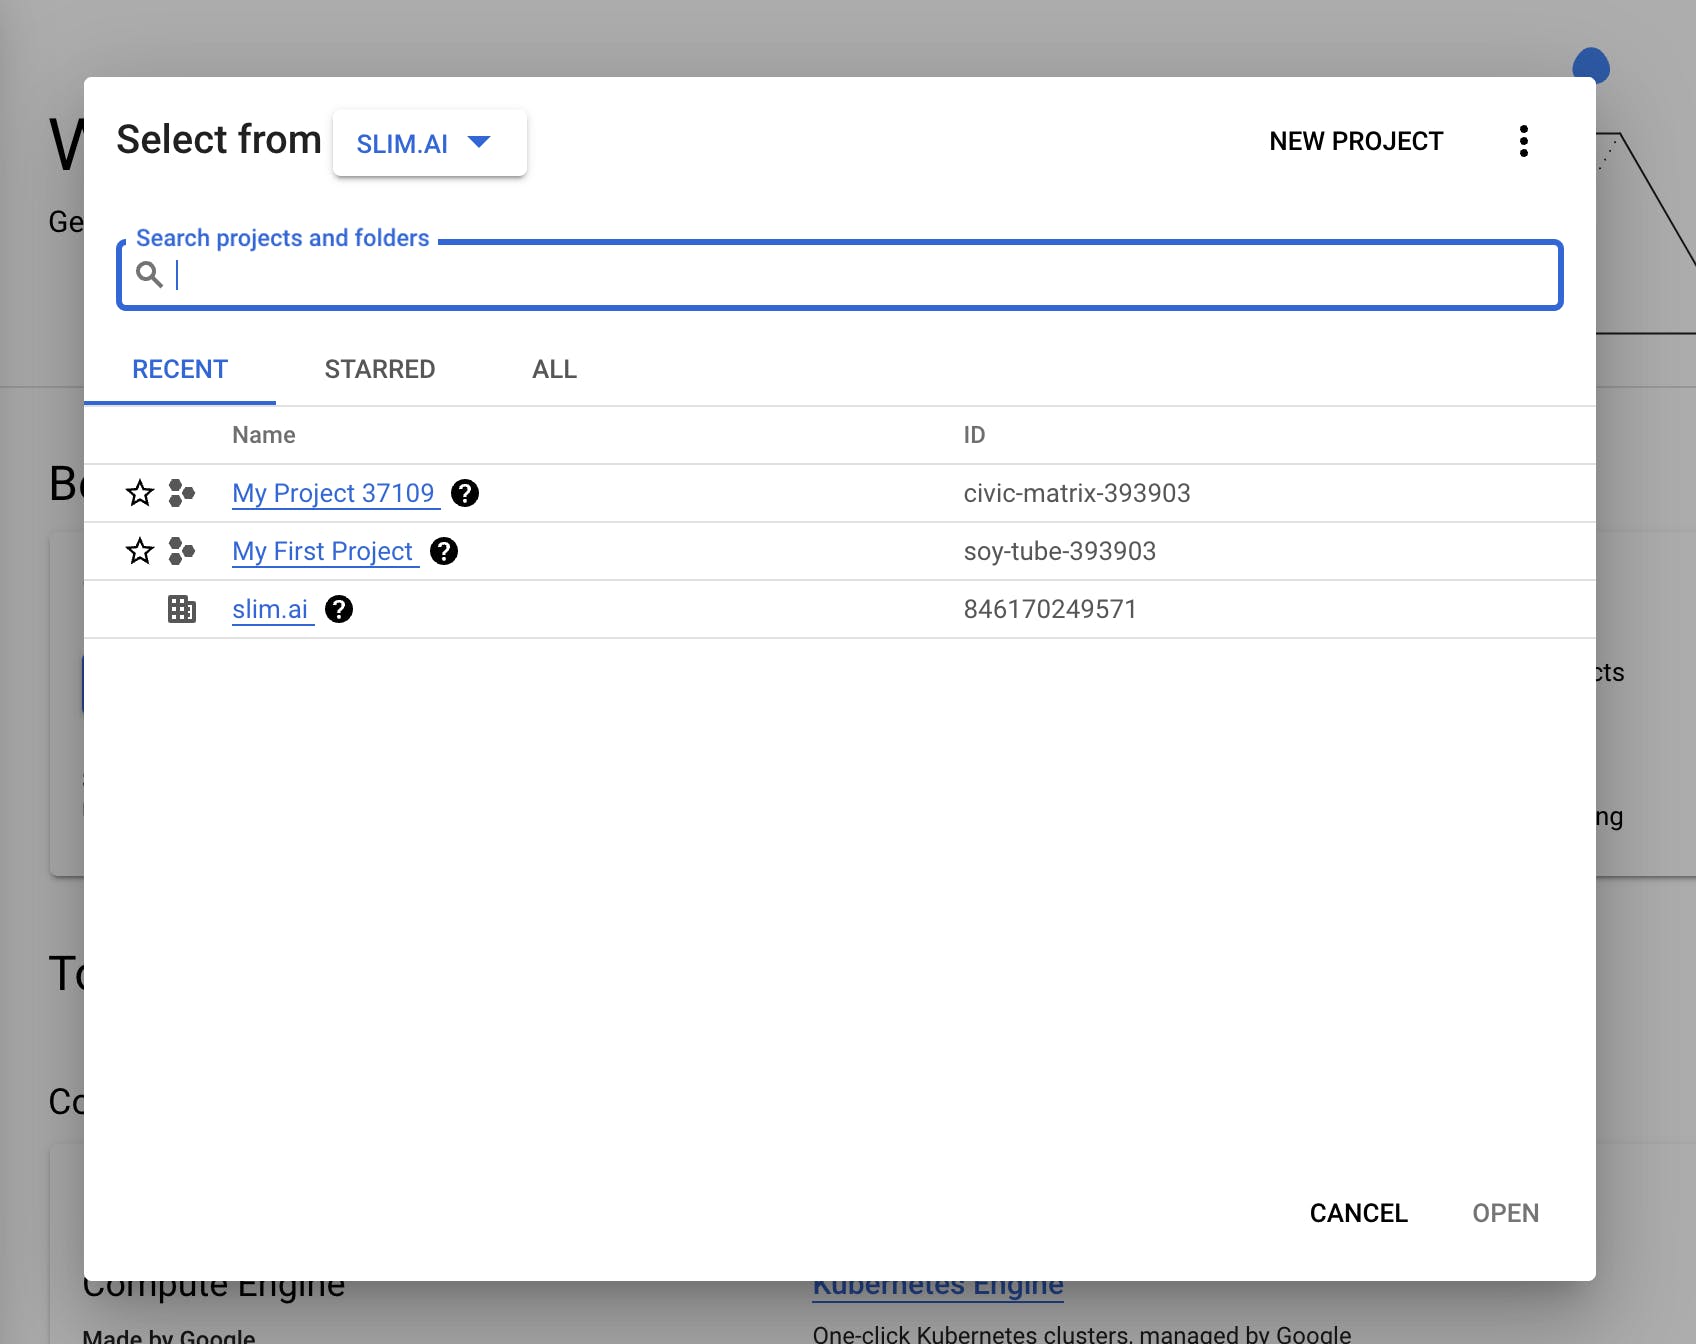
- Start from the Google Cloud Console and click on “Select a project” from the top navigation bar.

2. Select a project you want to connect to the Slim platform and click “Open”.
3. Once you’re in the project-specific overview, check that your organization’s Billing account is connected to your project.
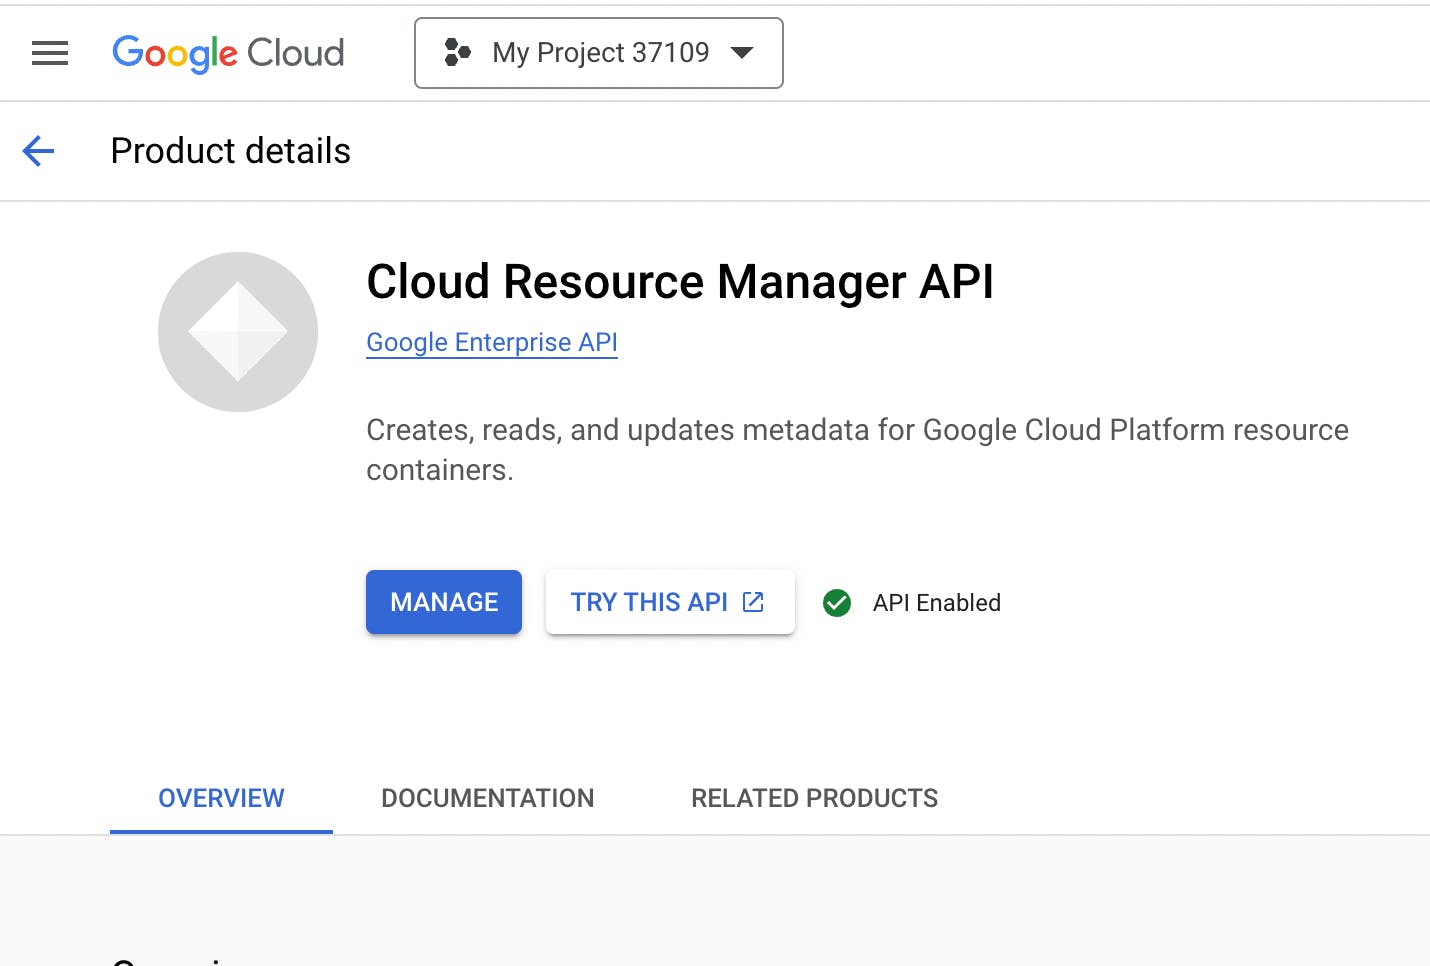
4. Enable the Google Cloud Resource Manager API in order to create, read, and update metadata for Google Cloud Platform resource containers.
Create a Service Account
In the Google Cloud Console, you can create a Service Account credential in order to fully configure a connector specific to Slim.
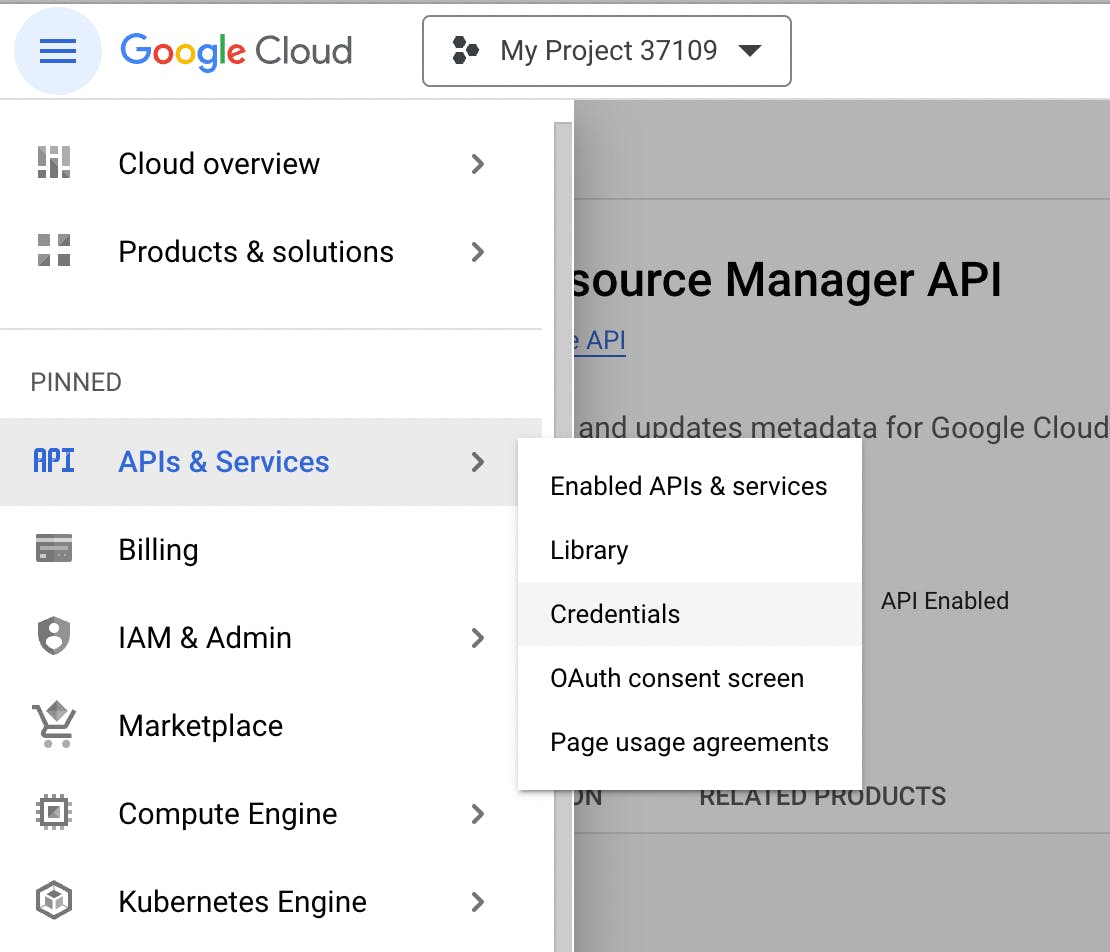
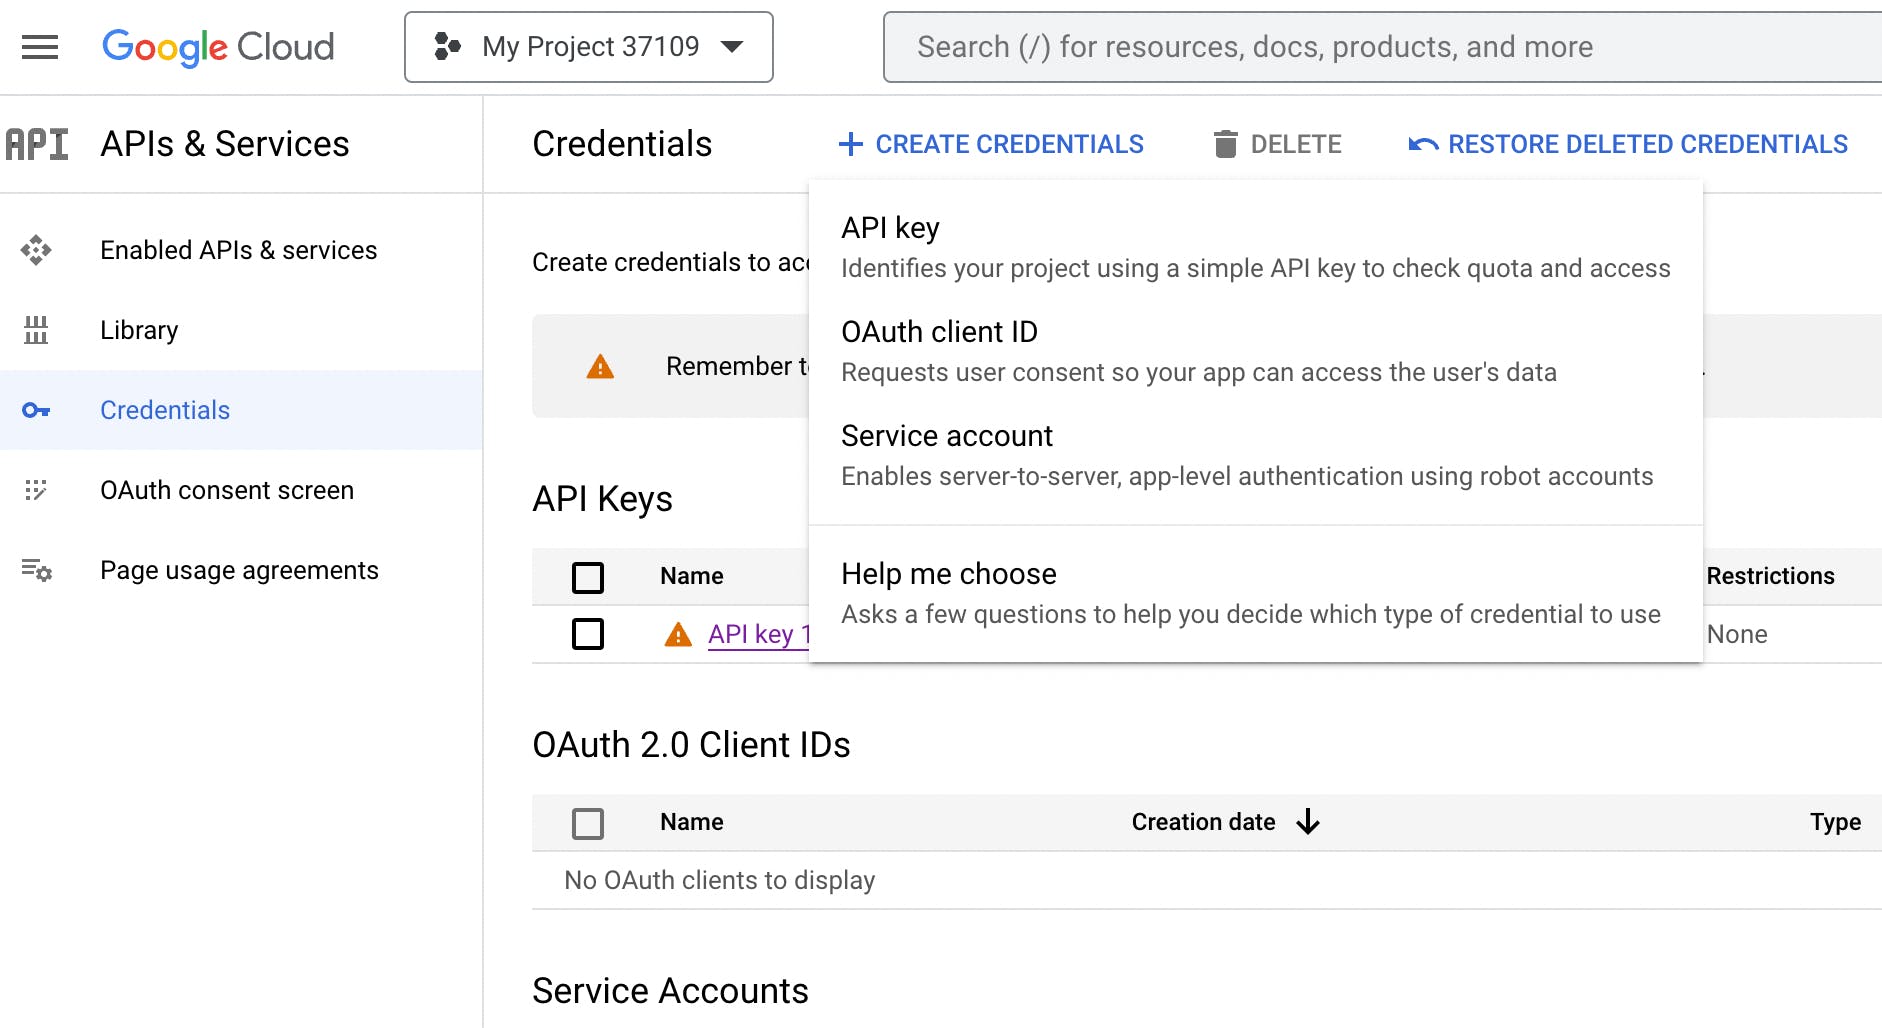
- In the API > Services > Credentials overview, click on “Create Credentials”.
2. Within the Create Credentials dropdown, select Service Account.
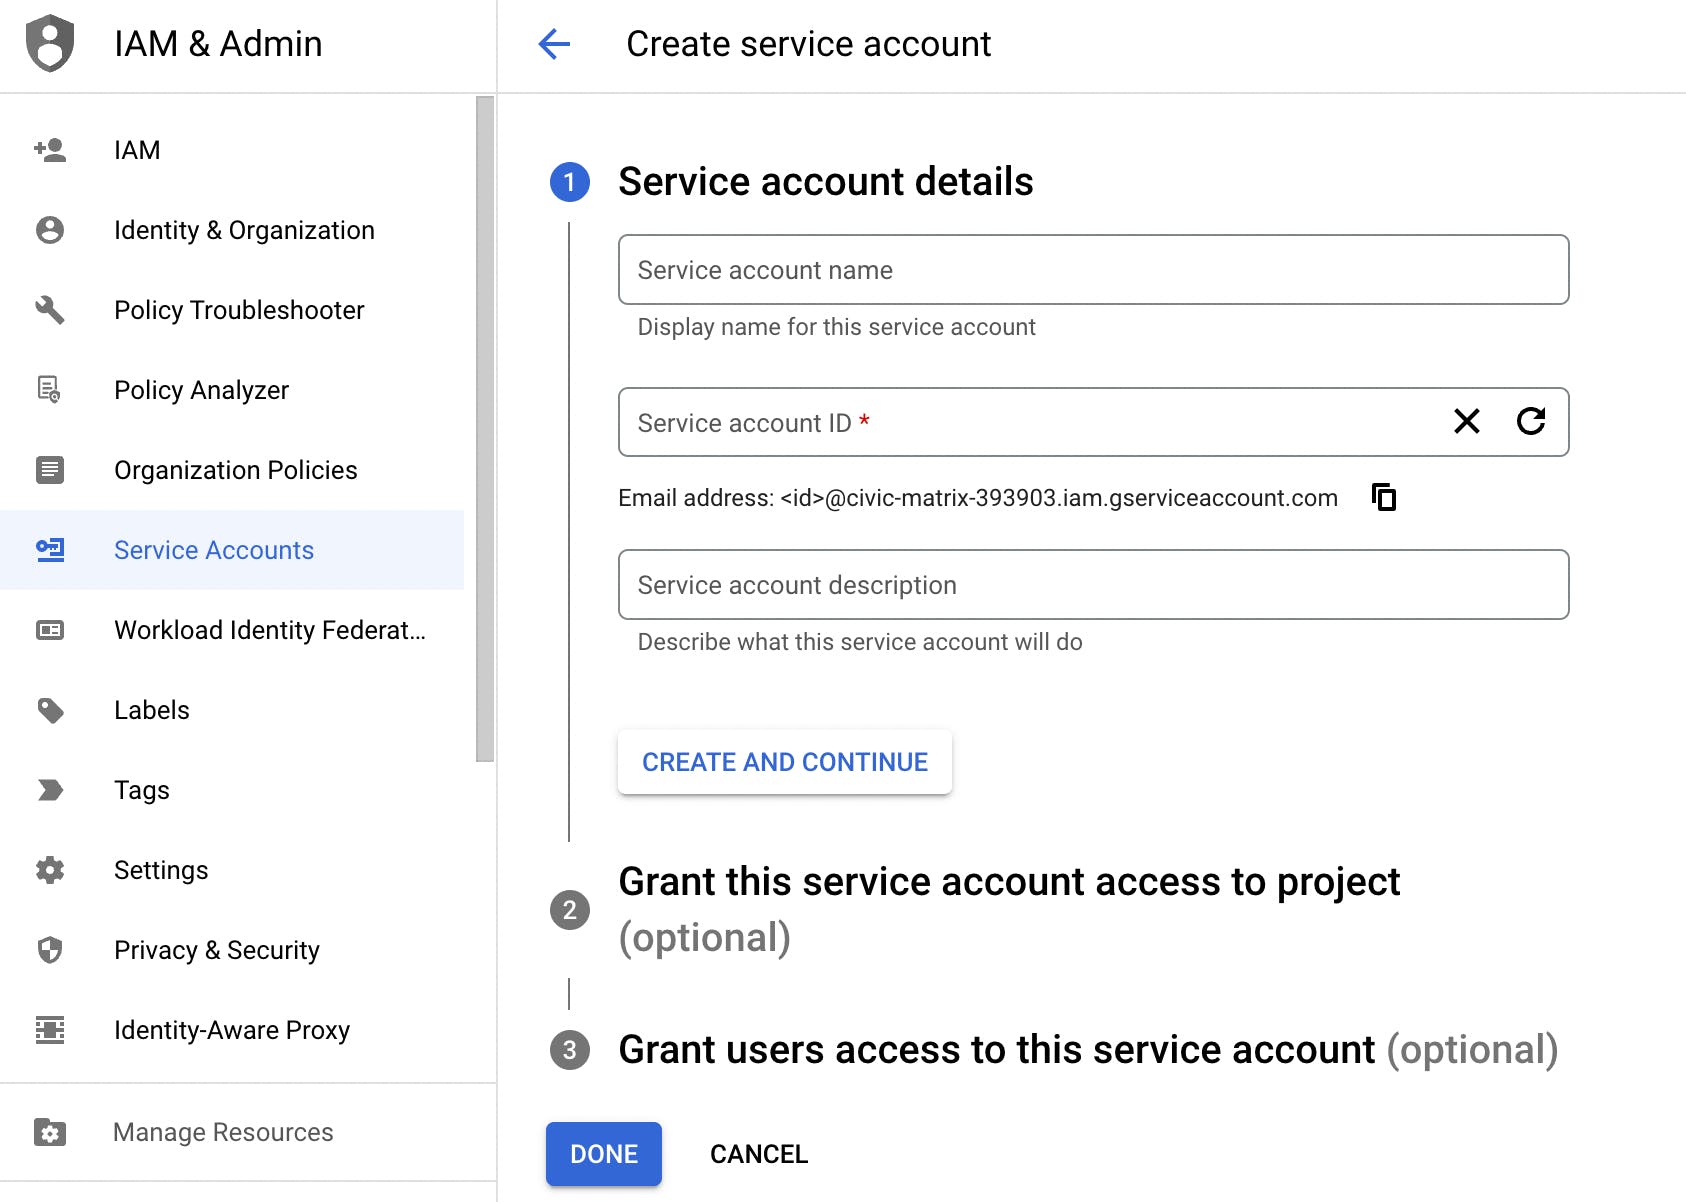
3. Create a Service account display name, service account ID, and add in an optional description. The service account ID may be auto-generated based off of the service account name field, but can be customized to another name if needed.
4. When you have finished filling out the form, click “Create and Continue”.
The new service account you created will be listed in the Credentials overview.
Add Service Account Permissions to Your Storage Bucket
With the new service account created, permissions will need to be added to your storage bucket.
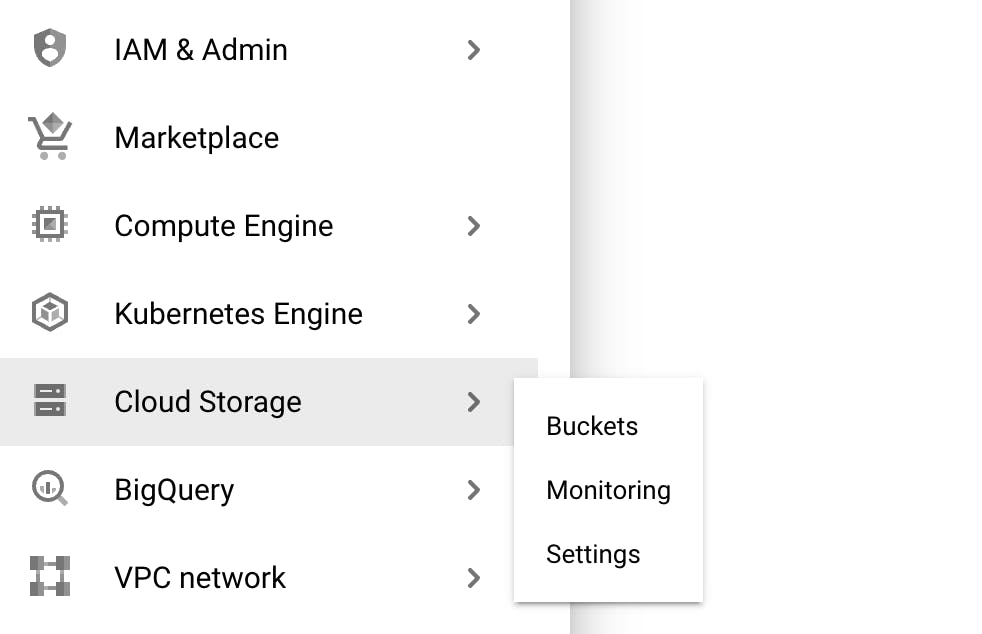
Navigate to the Storage Bucket overview.
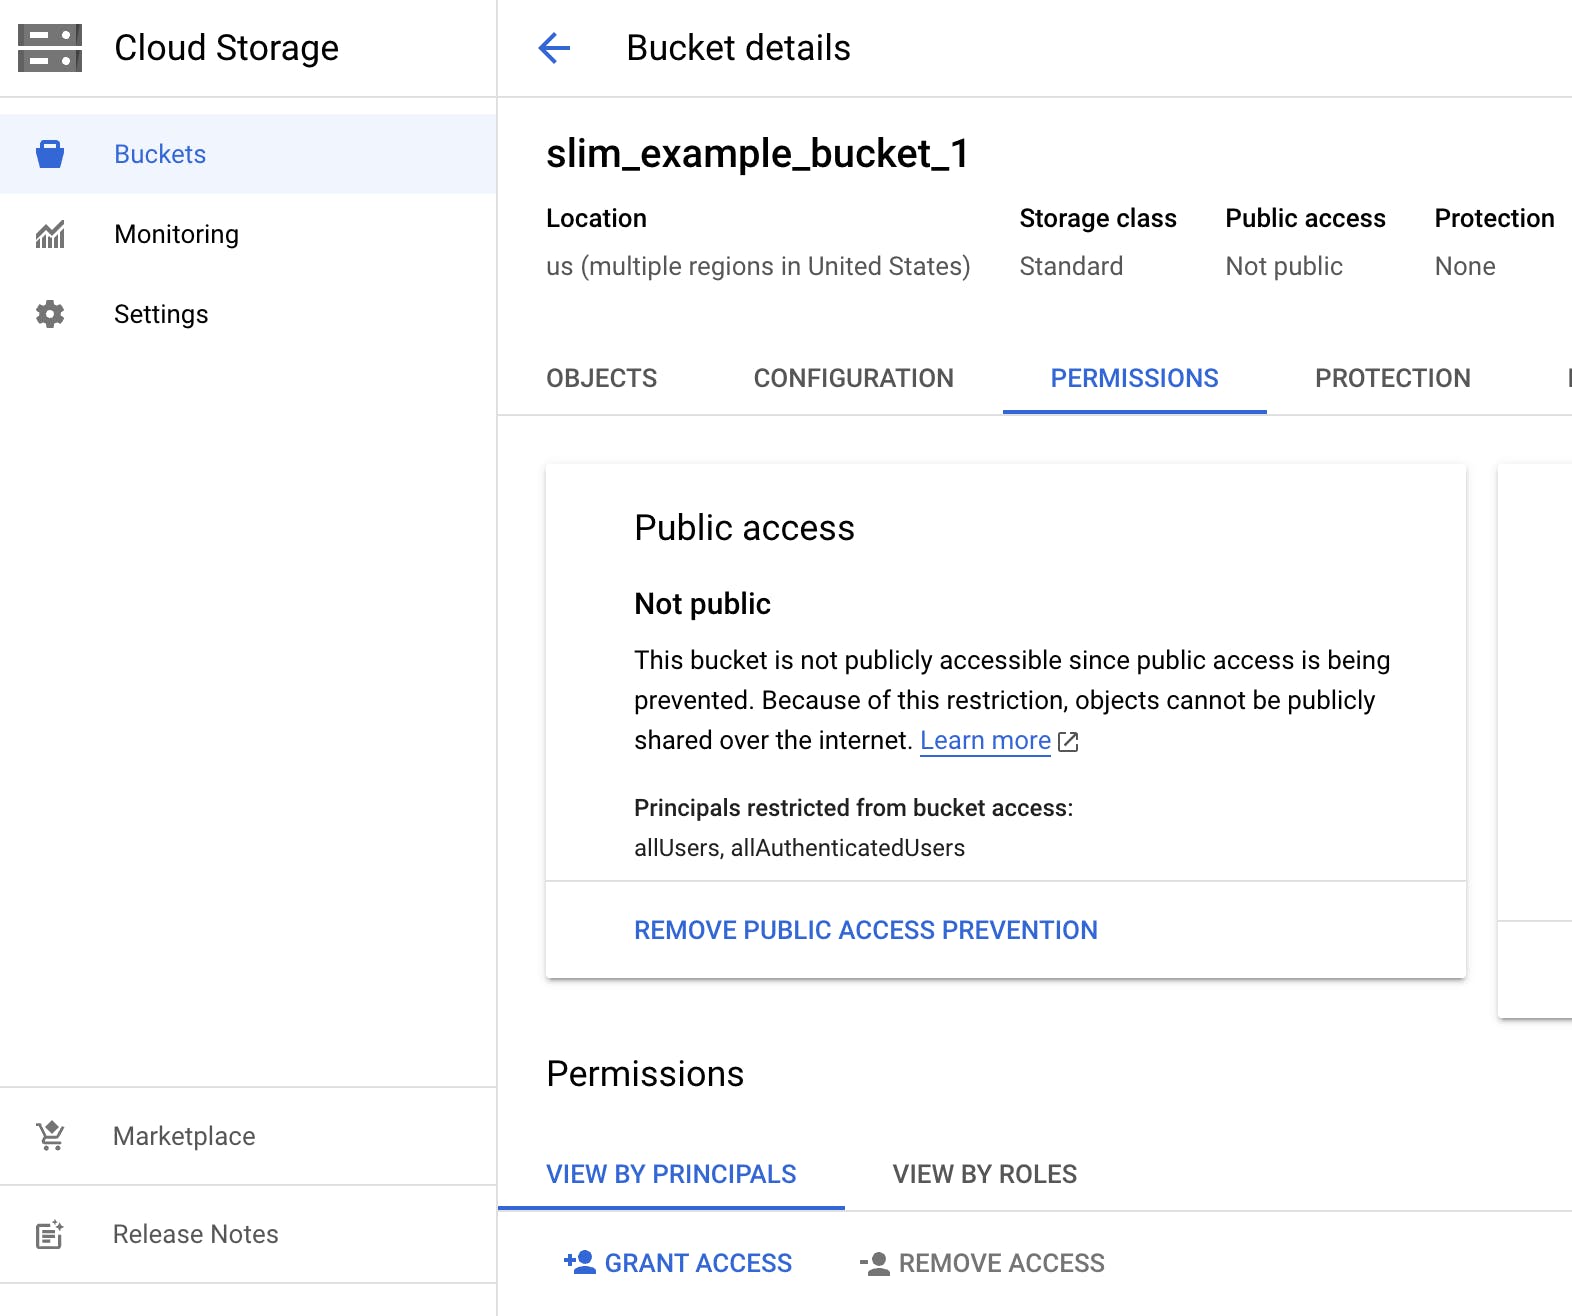
In the Permissions tab of your Storage Bucket, click “Grant Access” at the bottom of the view.
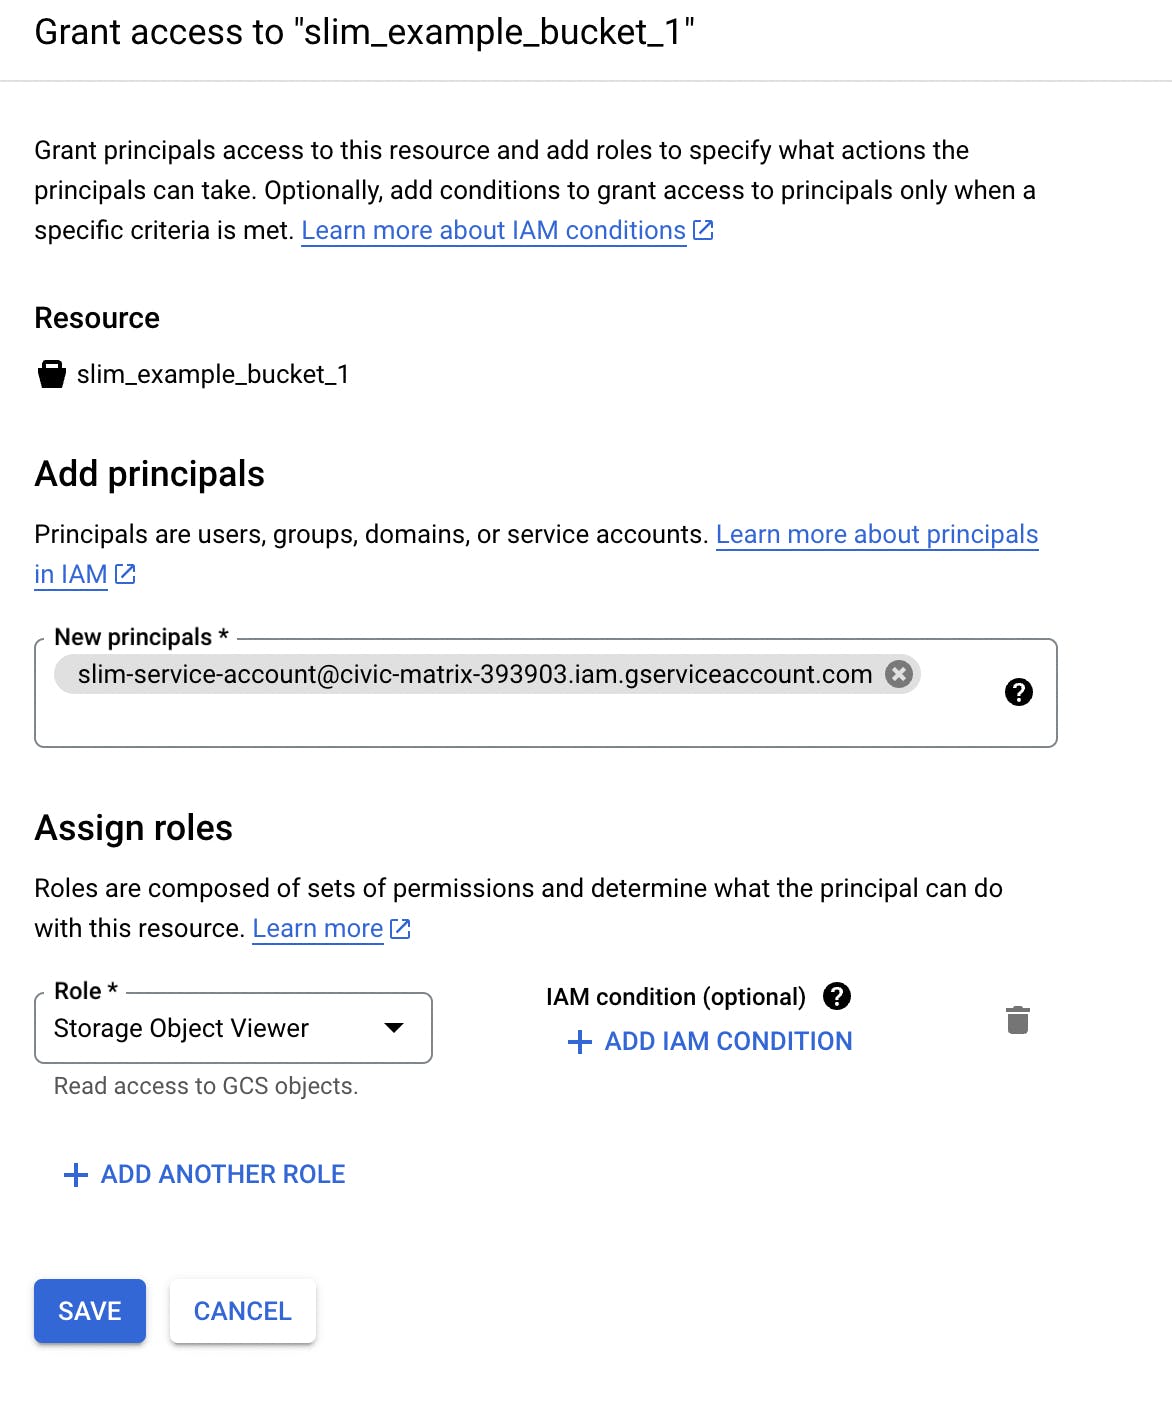
Add the service account email as a principal in the “grant access” form that displays.
Assign the role to be Storage Object Viewer and click “Save”. This will give the service account read-only access to your Storage Bucket.
Generate a JSON Key File
Within your new service account, you will generate a JSON key file that can be copied and pasted into the Google connector form.
- Navigate back to your project APIs & Services > Credentials and click into the specific service account you created.
- Click on the “Keys” tab.
- Click on “Add Key” and “Create new key”.
- Select the JSON format in the modal and click “Create”. A JSON file will be automatically saved to your device.
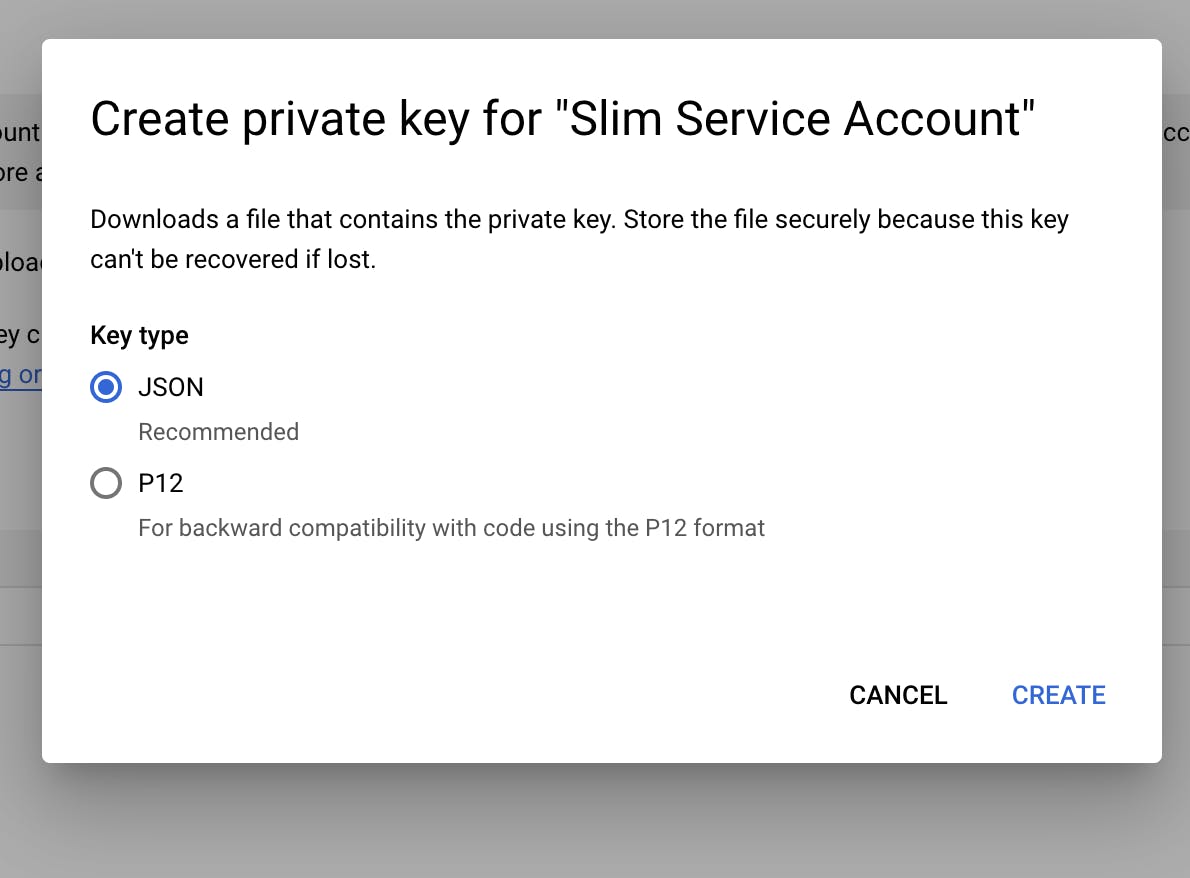
5. Open the JSON file and copy the entire contents of the file.
6. Paste the file contents into the Google connector form on the Slim platform and click “Save”.
Your GCR connector should now be successfully saved and listed under My Registries!
Digital Ocean
Select the Digital Ocean container service option.
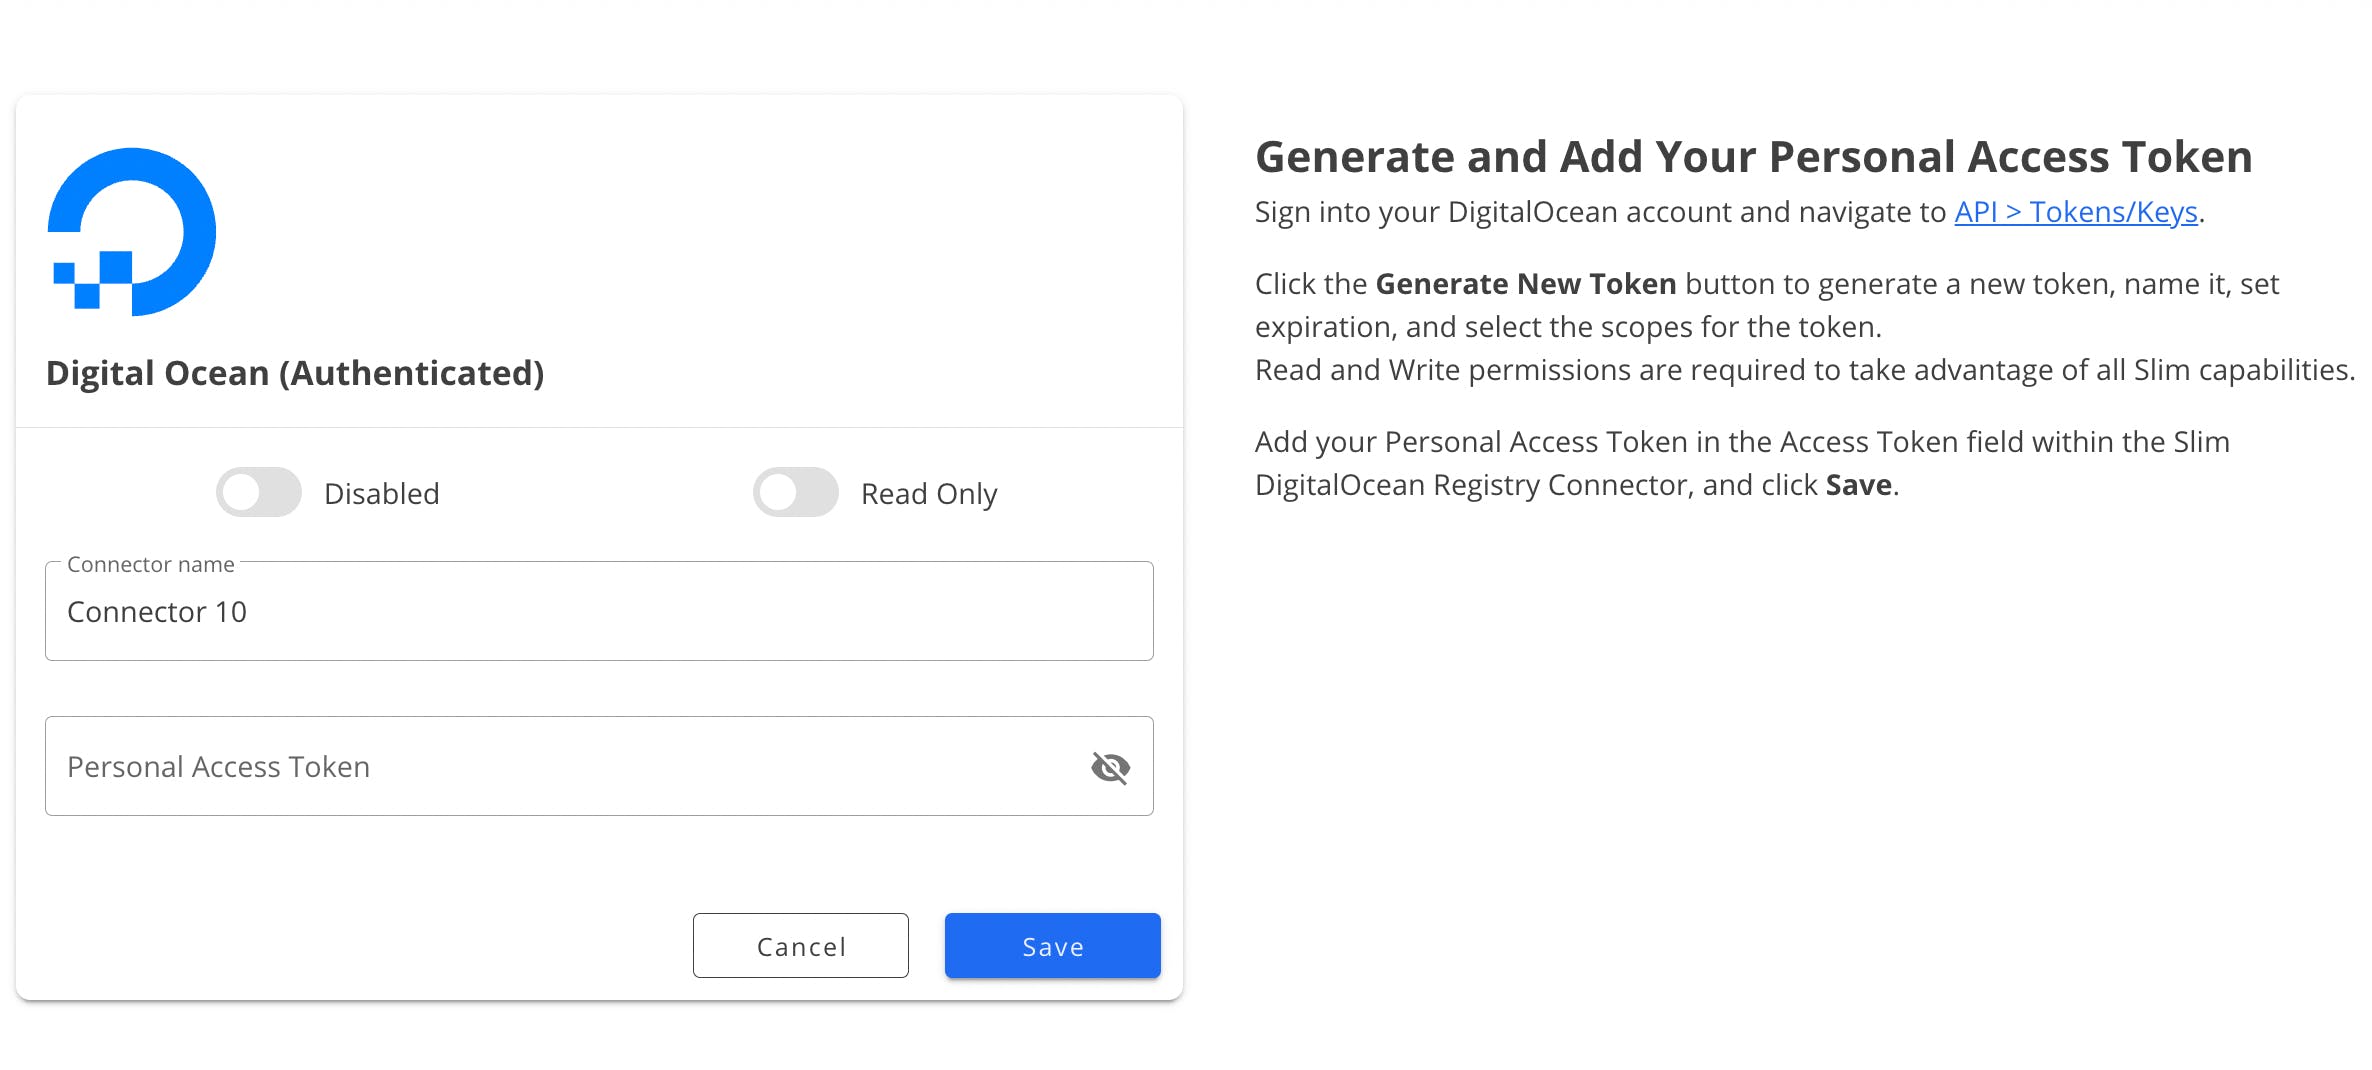
The platform will take you to the Digital Ocean connector form.
Sign into your DigitalOcean account (or register if you do not have one yet).
Navigate to Applications & API.
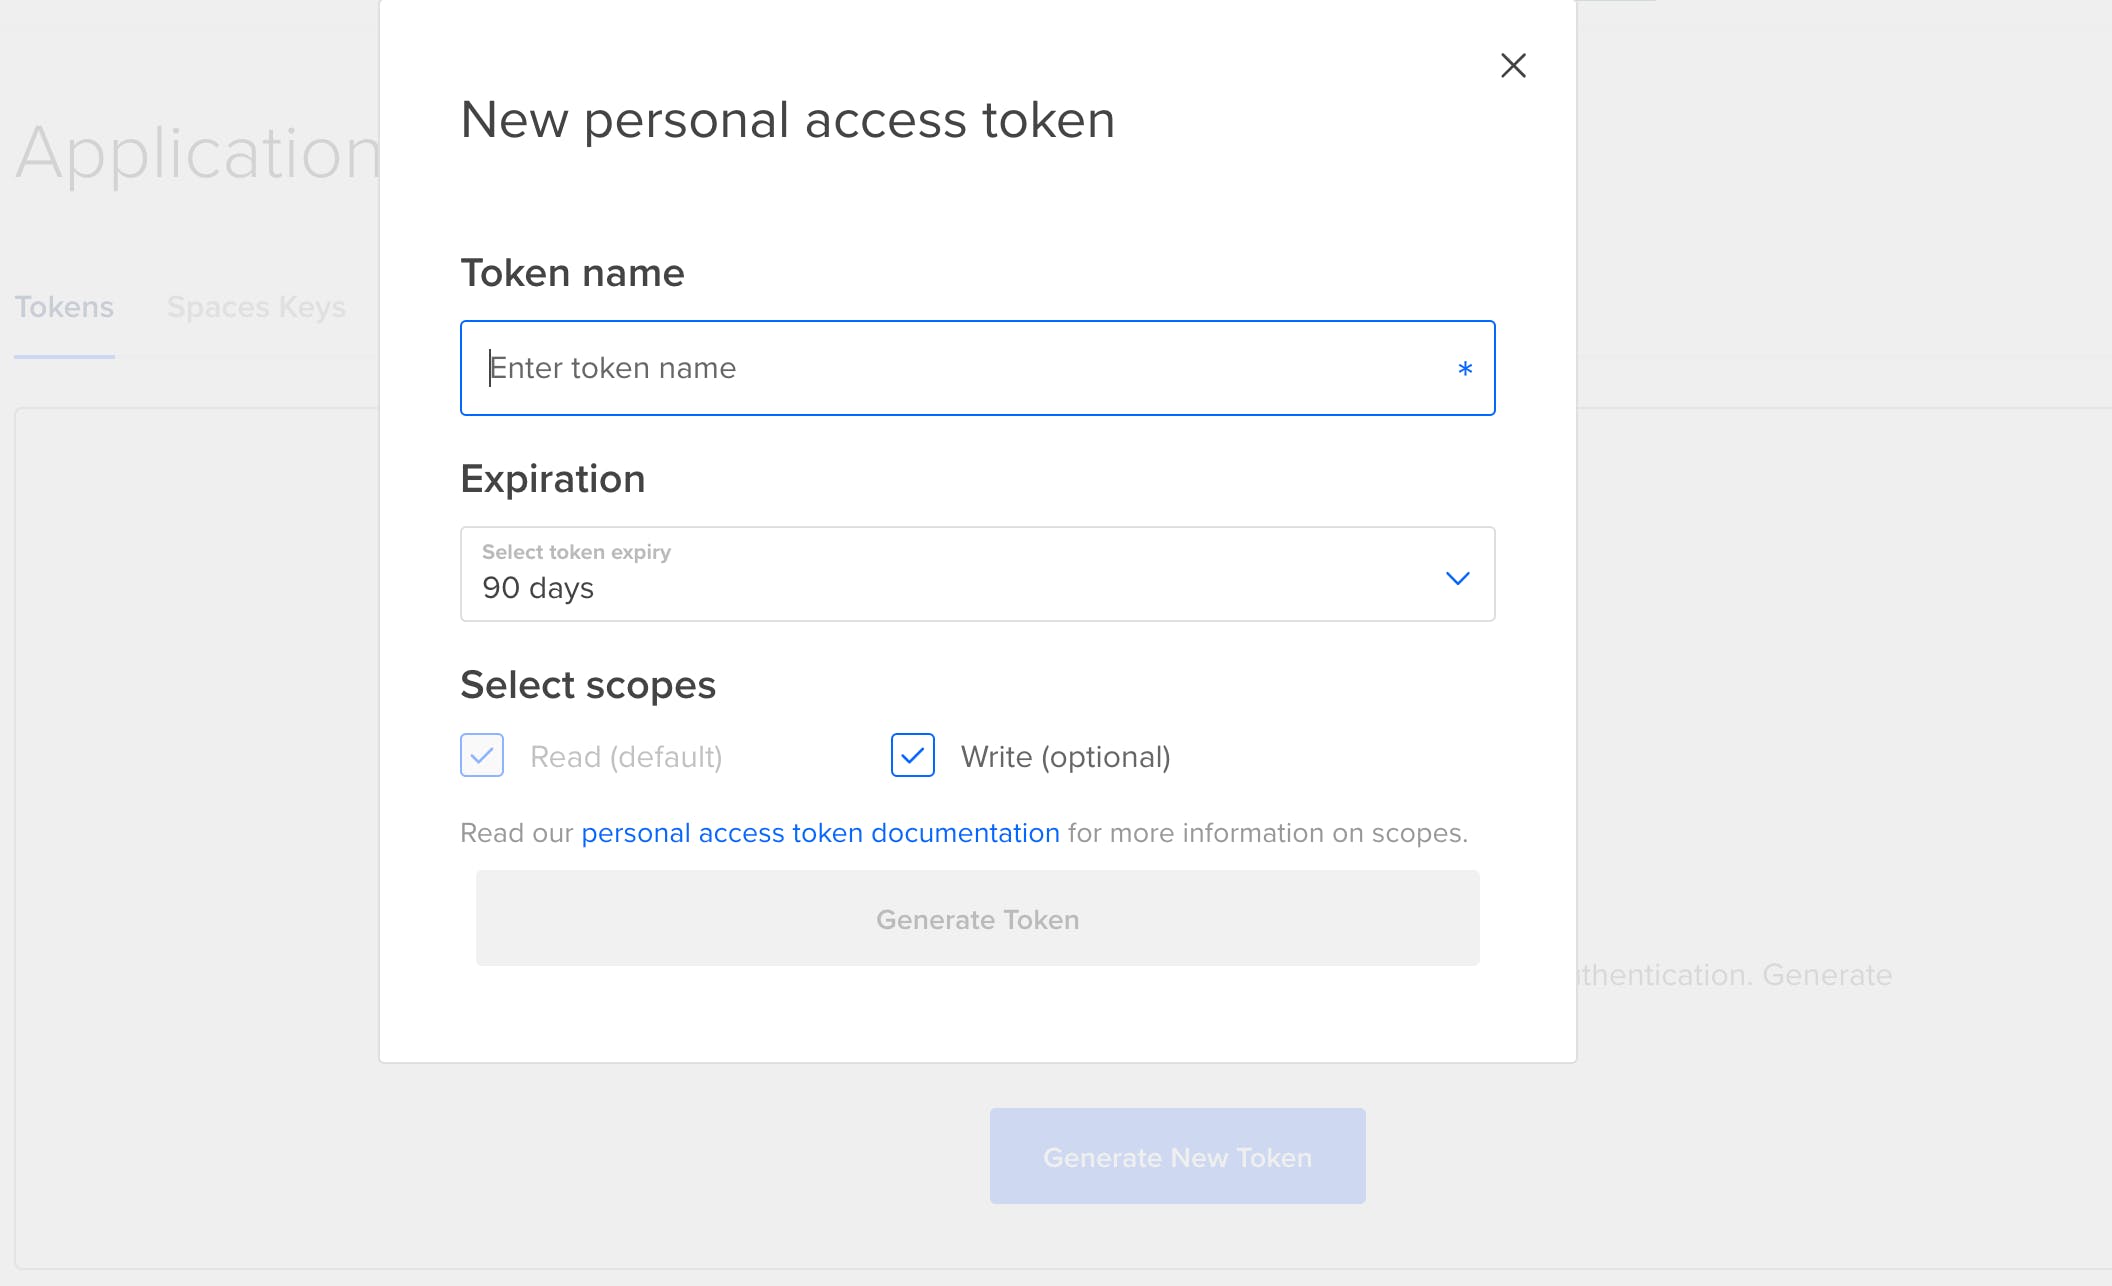
Within Digital Ocean, click the ”Generate New Token” button to generate a new token.
Enter a token name of your choice. Set an expiration date of your choice from the dropdown menu.
Select the scopes for the token. Read and Write permissions are required to take advantage of all Slim capabilities. Both of these permissions may be selected by default.
Click on the “Generate Token” button.
Add your Personal Access Token in the Access Token field to the DigitalOcean Connector form on the Slim platform, and click ”Save”.
Quay
Step 1: Create an organization
Login to quay.io and create a new organization by selecting New Organization.
Next, on the create organization page, enter an organization name, select a plan and click the Create Organization button.
Step 2: Create a repository
Select the Repositories tab on the navigation bar. On the Repositories page, select the Create New Repository button on right panel.
On the create new repository page, enter a repository name, make the repository private. You will at least need a Quay Developer subscription to use private repositories.
Step 3: Create a Robot account
Select the repositories tab, and on the repositories page, select the organization created above (the organization on the right panel).
On the organization page, head over to the Robot Accounts tab, on the left panel of the page.
Click the Create Robot Account button, create a robot name of your choice, and select Enter.
Add permissions for the robot account created above. Select the repository you would like to grant access to and issue the write permission. Write permission is needed for both pull and push permissions needed by slim.
Click the Add Permission button to enable the permission.
Step 4: Add your Robot account
Select your newly created robot account. A modal will pop-up with the robot account details.
Finally, enter your Quay Robot account name and Robot access into the Slim Quay Connector form. Click Save.